Categories
Camping

Easy Tasty Spaghetti Bolognese: Camping First Night Recipe

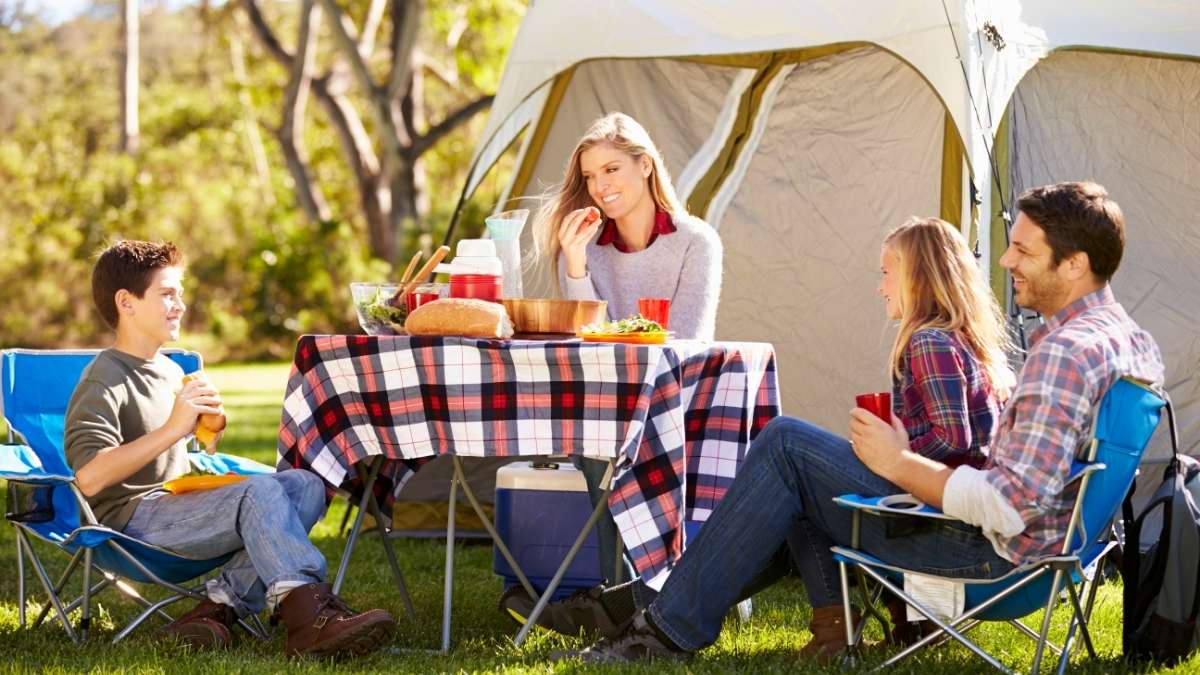
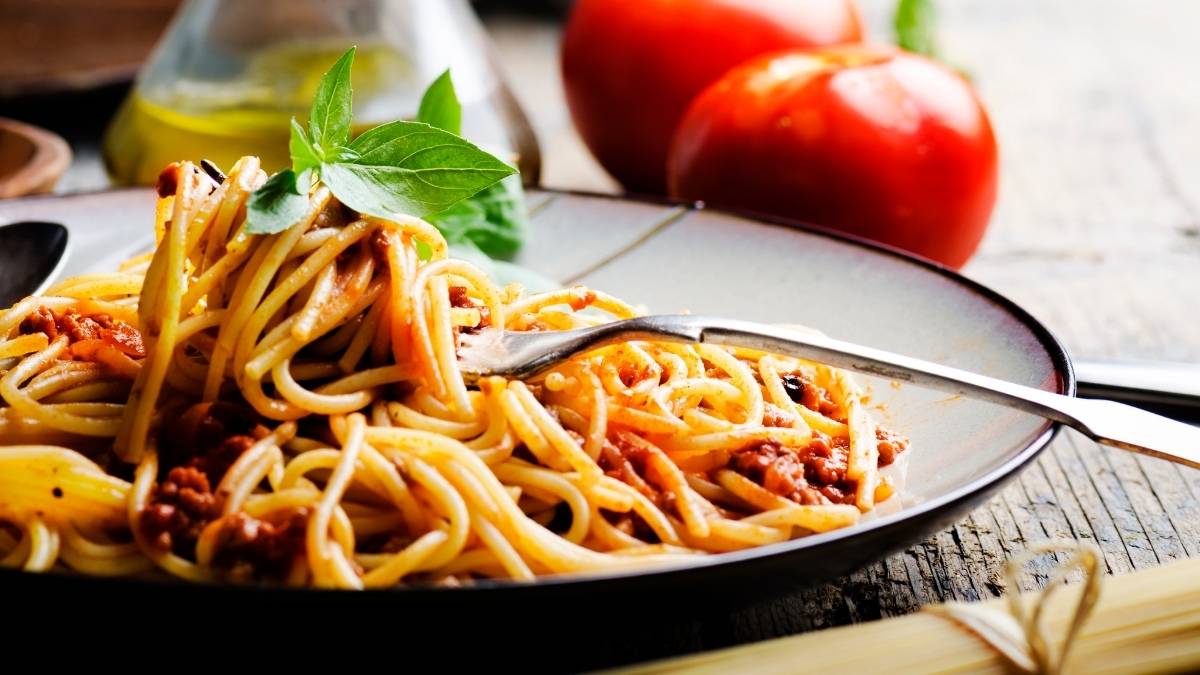
This popular dish is a winner for the first night meal on a camping trip. Our easy tasty spaghetti bolognese recipe will provide plenty of sustenance for tired campers after a long day.

Spaghetti bolognese is nearly always our first choice when planning our first-night camping dinner.

After a long journey and maybe setting up in challenging conditions we need to be able to rely on a quick and easy solution. People are likely to be hungry so being able to turn out a satisfying, tasty and quick meal is crucial.

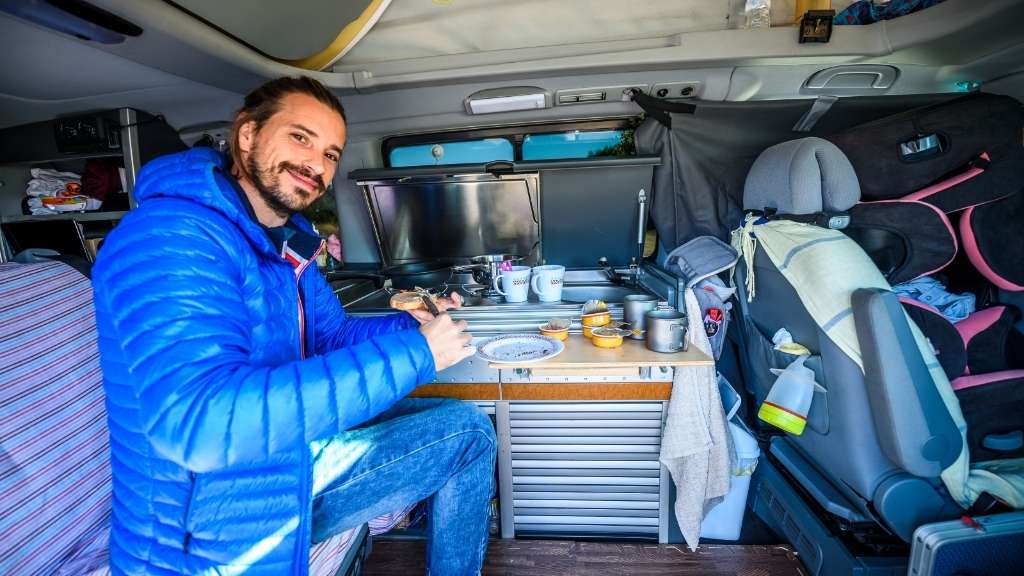
This meal takes too long to do properly in the campervan and instead it lends itself to be cooked at home first and brought along in the fridge.

The bolognese sauce will keep for a few days if stored properly so if some other option crops up for dinner on night one, it doesn’t matter.

Here is our recipe for an easy, tasty spaghetti bolognese.

How to make homemade spaghetti bolognese the easy way

This recipe is easy but it’s not particularly quick. This is mostly due to the simmering time involved and not the active participation of the cook.

It’s easy because there is little skill involved in making the dish and it doesn’t matter much if you cook parts for longer or leave out a minor ingredient. It’ll still be delicious at the end – it’s not Masterchef after all.

What you are after is something tasty and nutritious after a busy day enjoying the outdoors. Follow our step by step recipe and that’s what you will have.
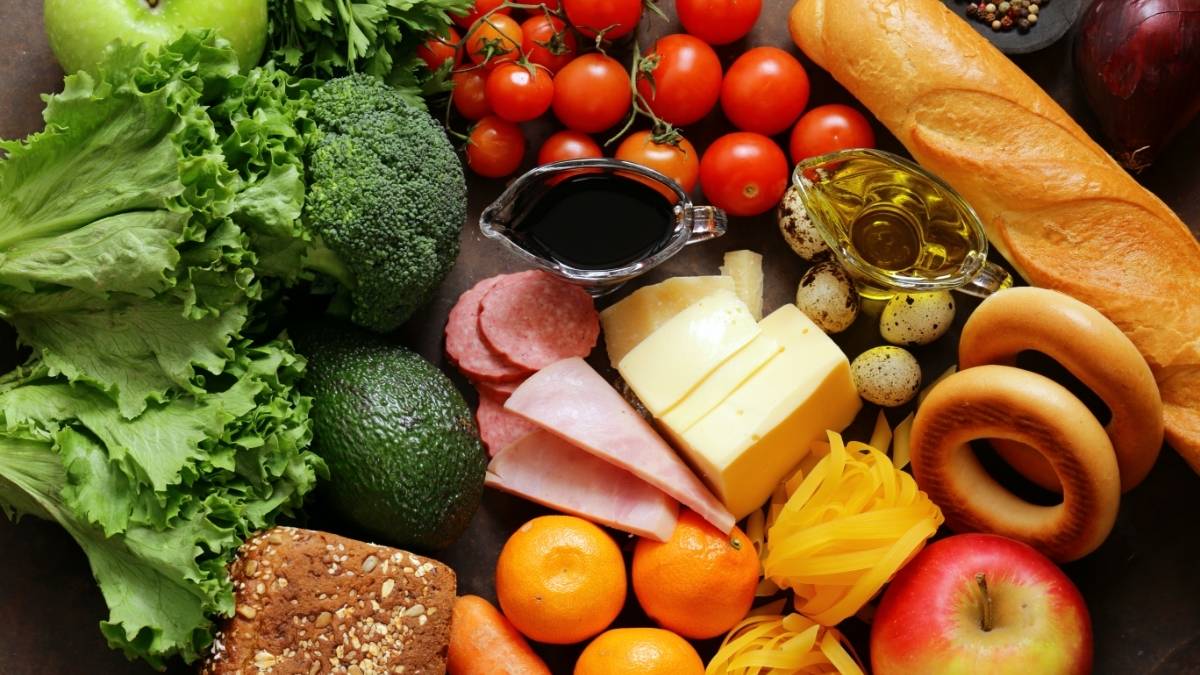
Ingredients

Some of these ingredients might surprise you like adding milk and using half-beef and half-pork mince, but the end result really works!

  • 250g beef mince
  • 250g pork mince
  • 4 rashers smoked bacon or pancetta (approx 120g)
  • Large onion (approx 160g)
  • 1 carrot (approx 80g)
  • 1 celery stick (approx 80g)
  • 400g tin chopped tomatoes
  • Tomato puree
  • 100ml milk
  • Oil

Again, if you add a little more or less of this or that it doesn’t make a huge difference overall.

Extra additions you can make include white wine. I don’t add this as my kids spotted me adding it once and then refused to eat it. I haven’t noticed much difference in the flavour with or without wine, so I tend to leave it out.

Equipment needed

  • Chopping board
  • Large knife
  • Large cooking pot
  • Measuring jug for milk (or roughly guess 100ml by eye if you know a pint is 568ml)

That’s it, easy! Now we’re ready to cook.

Step by step spaghetti bolognese

Preparation

Get all the ingredients prepped in advance.

First, chop up the vegetables. I tend to cut mine really small to hide them – we have a fussy eater in the house. If you don’t have this problem, dicing is good enough.

Next, chop up the bacon into small pieces. The bacon is there to add a bit of salt and smoky flavour to the spaghetti bolognese.

Last, measure out the milk. Do this now rather than adding by eye later, so that it is on hand when you need it.

Cooking method

Step 1. Heat a little oil in a large cooking pot. Once it’s heated up, add the bacon or pancetta, whatever you are using. Fry the bacon until it starts to crisp up and looks golden.

Step 2. Add the beef and pork mince. Fry this with the bacon until the meat is all cooked through and there is no raw meat left.

Step 3. At this point, add the onions, carrots and celery and cook until they are tender.

Step 4. Add the milk and simmer for 10 minutes. You can walk off and do something else at this point. Keep the pot on low heat, just enough to simmer.

Step 5. After 20 minutes or so, it’s time to add the tomatoes and tomato puree. Stir these in well and bring back to the boil.

Step 6. Once the bolognese is boiling again, turn it straight back down to a simmer and leave it for 30 minutes. Stir occasionally to make sure it isn’t sticking at the bottom. If it is sticking, the heat is too high.

Finito!

After 30 minutes or so, more or less, it doesn’t much matter, turn the heat off and put the lid on. Leave it to rest and cure further until it has cooled.

When sufficiently cooled either put it in the fridge, take some to heat back up for dinner, or separate into two-person portions and pop straight in the freezer. Job done!

What I like about spaghetti bolognese is you can multiply the ingredients and make a mega-batch. I always do this because to me it makes sense.

If I am going to the trouble of creating the dish and all the washing up associated with it, why not make many portions at once and freeze them?

Spaghetti Bolognese as a first night camping dinner

So with our bolognese sauce all ready to go, all that remains is the pasta. I supposed this dish should really be called pasta bolognese as we rarely use spaghetti. This is mostly because penne or fusilli is easier for our kids to eat. 

We boil a large pot of water with a chicken stock cube dissolved in it and add 80g of pasta per person. When you’re away in the campervan you are unlikely to have weighing scales at your disposal, I know we don’t, so instead I use handfuls or cupfuls. I know by eye how much we eat as a family of four as I’ve done it so often.

I use a stock cube in the cooking water as it gives the plain pasta just a little more flavour.

In choosing the pasta, we tend to go for wholemeal instead of white pasta. I just substituted the white pasta for wholemeal one day and the kids didn’t notice.

White pasta has been stripped of many of its nutrients and fibre as it is so processed. We find wholemeal pasta has more flavour too.

There was a time when we went through a phase of buying fresh pasta. We have found that dried pasta is hardly any different and has the obvious added benefits of having a long use-by date and is cheaper.

How to serve spaghetti bolognese

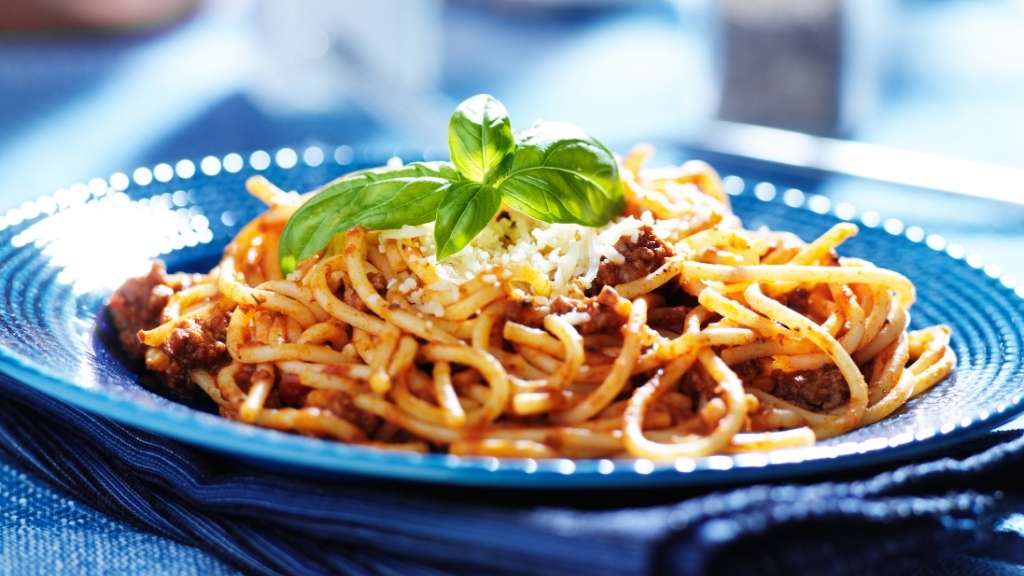
We like to serve our spaghetti bolognese in bowls, rather than on a plate as it helps to keep the heat in the meal for longer.

If we have parmesan cheese on hand, we’ll sprinkle some on top of the spaghetti bolognese. Our kids like double cheese – grated cheddar and a sprinkle of parmesan.

It’s unlikely we would have basil if we were camping in the campervan but if we eat this meal at home, I’ll liberally decorate it with basil too.

This recipe makes a not-particularly-salty version of spaghetti bolognese so I would also recommend adding salt and pepper to individual plates that prefer a bit more seasoning (that’s me). Our kids don’t like meals which are too salty and neither is it good for them (or any of us!) so we tend to keep our meals relatively low-salt.

Spaghetti Bolognese Q&A

Q – Why put milk in bolognese sauce?

Good question! I had previously never made a bolognese sauce with milk in until one day I was taught otherwise by a gourmet cook friend of mine.

The answer seems to be two-fold. One – it helps to tenderise the meat and two – it takes the acidic edge off the tomatoes. It also makes the bolognese sauce have a creamier, less dry texture.

Q – Is spaghetti bolognese healthy?

Spaghetti bolognese isn’t the lowest calorie meal option out there but it is a relatively healthy choice.

In terms of calories, the pasta alone in an 80g serving size will be around 265 calories. You can expect a portion of bolognese sauce to have around 306 calories so 565 total calories including the pasta. Add cheese and you can be up nearer 650 calories.

As it is one of your three main meals of the day, that’s not terrible. A pasta dish containing cream, such a carbonara, has a lot more calories.

Q – Wholemeal pasta or white pasta?

In relation to the children, we don’t tend to think in terms of calories anyway, just overall healthy choices and we eat what they eat.

We add healthy alternatives where we can. For example wholewheat pasta over white pasta, low-fat mince, usually 5% only. Half-beef and half-pork mince make for less saturated fat overall. We add plenty of vegetables too so the meal is well balanced, and don’t add too much salt.

None of these substitutes cost the meal anything. It is still extremely tasty and always a popular choice with the kids.

Q – Should you have a lid on when cooking bolognese sauce?

No. I keep the lid off and allow the liquid to evaporate. I will put the lid on once I turn the heat off and allow the sauce to keep its heat a little longer and cure further.

Q – Can you freeze bolognese sauce?

Absolutely you can and I do this all the time. When the sauce has properly cooled I’ll measure out portion sizes – typically 650g for our family of four and freeze in suitable freezer bags. These reusable ones are great for that. If I am doing two-person sizes, I’ll half that amount. It means you can defrost exactly the amount you need, so there’s no waste.

Q – Can you cook spaghetti bolognese from frozen?

I have tried this and I have to say it is always easier to have let the bolognese sauce thaw first. If you have a couple of frozen lumps, no problem to finish them off with the heat. 

If you are in the position where you are cooking with a frozen parcel of bolognese sauce though, heat it up on the stove with a very gentle heat underneath. Allow plenty of time for it to cook this way.

You want to have the fully thawed sauce boiling for 5-8 minutes to make sure it is reheated right through.

Categories
Camping

Easy Bacon and Pea Risotto Recipe: Camping Dinner Sorted!

This traditional Italian dish is a straightforward and satisfying meal for camping or at home. Our bacon and pea risotto will satisfy most campers and is guaranteed not to have any leftovers.

There is something about the teaming of bacon and pea that is just simply delicious. The salty bacon and the sweetness of the peas – yum!

This recipe is a quick and easy option which you can make in your campervan or tent to serve four people. It is kid-friendly so is always a staple on our menu.

It is very similar in nature to paella but even easier and quicker to make. Nice to vary it up when away on a trip.

How to make the perfect bacon and pea risotto

This is a one-pot meal which can be cooked in a campervan, on a camping stove, or over a campfire. Only six basic ingredients are required.

Ingredients

  • 1 onion
  • 6 rashers smoked streaky bacon
  • 300g risotto rice
  • 1L chicken or vegetable stock
  • 100g peas
  • Olive oil (or any other type of cooking oil you have)
  • Parmesan cheese to sprinkle on top (optional)

We tend to buy ready-grated parmesan. Parmesan is a hard cheese to grate and the extra you pay for having it pre-grated is definitely worth it. Also saves on washing up.

Equipment needed

This recipe is so quick and easy, you really don’t need much:

  • Chopping board
  • Large frying pan
  • Sharp knife
  • Jug/container for stock

Preparation

Start by prepping all the components. Dice the onion, chop the rashers of bacon into small pieces, and have the stock ready-made and on hand.

Cooking method

The cooking bit is super easy. Fry the onion in oil for about 5 minutes on a gentle heat until golden and then add the chopped bacon. 

Cook the bacon for another 5 minutes or so. Once it looks cooked and shows some caramelisation it’s time to add the rice. 

Stir the rice in thoroughly until it is well coated. Add all the stock and bring to the boil.  Once it has come to the boil, turn it down to simmer.

Continue to simmer until the rice is almost cooked through. This takes about 15-20 minutes.

At this point stir in the peas and continue to cook the risotto until the peas are cooked through. The risotto should have a creamy consistency and not be too dry.

Once the peas are cooked it’s time to serve. Et voila!

How to serve bacon and pea risotto

Bacon and pea risotto served and ready to eat

Like paella, bacon and pea risotto is a very filling dish so we don’t tend to add a side dish. Serving risotto in a bowl rather than on a plate seems to help keep the meal warmer for longer.

We sprinkle grated parmesan cheese (if we have it in) over the plated risotto, which complements it nicely. A squeeze of lemon can be a substitute for some extra zing.

Bacon and Pea Risotto Q&A

Q – How much does it cost to make bacon and pea risotto?

This risotto comes in cheaper than the paella as it has less meat in it. You can expect to make this dish for four people for around £6.50.

Q – Can I make risotto with different types of rice?

Risotto or arborio rice is very similar in nature to paella rice. It is round and starchy and its composition means it can absorb five times its weight in liquid. 

For this reason, and much like in paella, it is important to use a good quality stock as the risotto will heavily carry this flavour.

Other types of rice can not absorb the volume of liquid required to make a risotto so they are considered unsuitable. Arborio rice is best with redondo or bomba rice as a second choice.

Q – Is bacon and pea risotto good for me?

We estimate this recipe comes in around 400 calories per serving (more if you add lots of parmesan). It’s a good choice though as it is extremely filling and likely to not need to snack or have dessert.

As this is a one-pot meal, it saves on washing up afterwards.

Q – Is bacon and pea risotto gluten-free?

For the most part, the good news is yes! Arborio rice is naturally gluten-free. The places where gluten may hide though is in the stock you use and the bacon.

Look for a gluten-free stock option. We use these knorr stock pots which are gluten-free. Also, choose bacon which doesn’t contain too many additives. Additives can often contain gluten.

Categories
Camping

19 Quick and Easy Meal Ideas for Camping

Our selection of quick and easy meal ideas for camping will give you plenty of inspiration to plan your next camping trip – or decide what to cook tonight!

There’s always so much to think about when going away on a campervan trip and you want to make sure you’ve got your bases covered, especially if you’re feeding a crowd.

The last thing you want to be doing once you’ve pitched up is rolling up your sleeves and starting cooking a laborious meal.

Or worse yet, have to go out and look for food when you’re already starving.

Worry not. Own The Outdoors have got you covered with these 19 quick and easy camping meal ideas:

We have two gas rings in our campervan and a further two gas rings on our Cadac gas stove. All these meals can be cooked using a gas cooker and in most cases using just two gas rings.

First night camping dinner

I’ll set the scene: you’ve been driving all day, everyone is tired and you’ve just pitched in the tipping rain or howling gale. Everyone is ravenous.

When going away to explore a new area it is our preference to support the local economy by eating one meal out per day if we can. Typically our first night camping dinner needs to be served on site, unless we haven’t travelled far.

Assuming there is no restaurant or food van on site, we need to rustle up something reasonable PDQ.

Our solution is to bring a couple of pre-made meals just for this purpose. They will have been made in advance at home and then frozen into 2 person portions. This gives flexibility when packing the campervan fridge.

We will have defrosted our first-night camping dinner choice and have this ready to go. We’ll keep another couple of meals frozen and have them defrost slowly over the next couple of days and use when required.

Camping dinner ideas

BBQ steak with tayto tots and salad

1. Spaghetti Bolognese

Who doesn’t like spaghetti bolognese? Always a winner for our family of four. We use two of our 2-person portions of homemade bolognese sauce and cook dried pasta from our campervan pantry.

My Spaghetti Bolognese recipe is packed with “hidden” veg, so we don’t worry too much about a side salad. We’ll just sprinkle a bit of parmesan on the top.

Super quick and super easy!

2. Chicken curry with basmati rice

This not-too-spicy but very tasty chicken curry is also a good option for a first-night camping dinner. Alternatively, it can be camping night dinner #2 if left to defrost slowly over 24 hours.

Although we actually prefer brown rice over white rice at home, brown rice takes ages to cook so we use white rice when camping. As we’re cooking on a limited gas supply, we want to make the meal choices as least-gas-hungry as possible.

Boil-in-the-bag rice is another option instead of cooking brown rice from scratch. We prefer the flavour of white rice over any boil-in-the-bag rice you can buy from the supermarket. It’s all personal choice though.

This curry is delicious served with naan, greek yoghurt, and mango chutney.

3. Steak or burger served with tayto tots

This meal requires a little bit of home prep too, but just a bit.

As previously mentioned when cooking a campervan meal, you want to be mindful about the amount of gas you’re using. It’s a pain in the neck to go and source a new gas bottle midway through your trip.

“Tayto tots” are something we’ve made up at home. Boil enough potatoes for four people (or how many people you are) and when they are soft enough but still firm enough not to be mushy, cut into small pieces. Allow them to cool then bring in the fridge to be fried up on demand.

Not the most healthy choice but these are delicious. Take the ready-cooked potatoes and shallow fry in butter until they are golden brown.

Serve with a juicy rib eye steak or a tasty burger.

Another side we often prepare in advance is fried onions. They can be fried at home, brought along in a bag in the fridge and heated up in the frying pan with the steaks or burgers. Delicious.

Saves on gas ring space, washing up, and time spent.

4. Fish or prawns in foil served with lentils

This recipe is one you make fresh on-site. Wrap the fish in little foil parcels with some lemon and butter and cook for 12-15 minutes over moderate heat.

The lentil dish is great because they come ready to cook from a tin or packet so can be left as a meal choice for later in the week.

We create a lentil dish of green lentils, onions, garlic, chopped tomatoes and some spices.

5. Paella

This Spanish classic is one of our absolute faves and there’s always plenty to go round. It’s an easy one-pot dish so minimal washing up.

It’s a hearty feast of chicken, chorizo, onions, garlic, peppers peas and paella rice.

Check out our paella with chicken and chorizo recipe for full directions.

6. BBQ chicken and chargrilled veg skewers served with flatbread

These are absolutely delicious and very filling if served with flatbread or stuffed inside a pitta. Again, quick to cook and minimal washing up.

Either marinate the chicken in advance or brush with a tangy BBQ sauce.

7. Bacon and pea risotto

This dish is not dissimilar to the paella idea. Another delicious one-pot meal with minimal washing up that’s a real pleaser for the kids.

For full directions, see our bacon and pea risotto recipe.

8. Beef or chicken stir fry with noodles

This is another quick and delicious dinner option, with a cooking smell to work up an appetite.

We get some good quality steak or chicken and stir fry with a bag of ready-to-go stir fry veg. Our personal preference for a stir fry seasoning is the M&S teriyaki sauce. It has a tangy flavour and strong ginger base.

We bring packets of dried noodles to serve with the stir fry and cook on demand. These dried noodles cook really quickly – 10 minutes max.

If we are feeling really hungry, we’ll also cook a pan of rice to have on the side.

Camping lunch meals or lighter camping dinners

Chicken quesadillas cut into wedges

When we’re staying on site for lunch or want something light for dinner we go for quick and easy but satisfying. Here are our go-to favourites.

9. Cheese and ham croissants

These can be done on the gas hob on a low heat so as not to burn the croissant but high enough to melt the cheese. Wrapping them in foil offers extra protection against accidental burning.

The cheese and ham croissants can also be cooked in the RidgeMonkey XL. Make sure you keep turning the RidgeMonkey to avoid the contents from burning.

10. Ham and cheese toasties

As above but using bread rather than a croissant. Less greasy and calorific!

If there is some cheese sauce on the go from another recipe, I spread some on the bread before adding the cheese and ham to make it really gooey.

11. Pizza slices

You can fit two triangles of supermarket pizza into the RidgeMonkey XL to make a tasty light dinner or lunchtime meal option. We will usually serve ours with a side salad ready-made from the supermarket for ease and speed.

As with everything cooked in the RidgeMonkey XL make sure to keep turning the cooking pan over to avoid the contents from burning.

12. Spanish Omelette

This is a hearty lunch option or light dinner choice. Thinly slice the potatoes and the onion, fry these off and bind together with egg.

You can make a 1-2 serve Spanish omelette in the Ridgemonkey, or make a larger one in a frying pan to feed 4-6 people.

We find this more filling than a regular omelette and sometimes have some leftover to have as a snack later.

13. Hot dogs

A camping staple. Quick to make using either frying proper sausages or boiling frankfurter style sausages. 

Delicious served with fried onions, cheese and lots of sauce. We use fried onions pre-cooked at home to speed things up and save gas.

14. Chicken quesadillas

These super-yummy quesadillas are really quick and easy to make.

Cook some chicken in some Mexican-style spice, like an Old El Paso mix and then layer up a sandwich of two flour tortillas. You can add refried beans (camping-handy tinned food), cheese, cooked onions, cooked peppers, and salsa.

Once you have your “sandwich” made, brush the quesadilla with butter and gently shallow fry until lightly golden.

Cut and serve in wedges with soured cream.

15. Macaroni and cheese sauce

This is another dish where I have occasionally made the sauce at home and brought it along in the fridge. 

It will last for a few days in the fridge so can be used over the first few days when required. Perfect for pouring over salmon too.

If the sauce is pre-made then the whole dish just takes as long as the macaroni takes to cook. Nice and speedy.

We’ll sometimes add some ham and peas, if we have them, to add extra flavour and texture.

Camping breakfast food ideas

Traditional full English breakfast fry-up

Our kids are often happy with a quick bowl of cereal in the morning before they go running off to explore the campsite.

When we want them to have something more substantial we turn to these cooked breakfast ideas for making in our campervan or using our camping gas stove.

16. Bacon and egg burger

Another delicious camping staple which always features on our breakfast menu.

Breakfast-in-a-bun also saves on washing up, and our kids love the excitement of eating a burger for breakfast.

17. Pancakes

We often eat pancakes at home for breakfast and trips away are no exception to this. We serve them up with bacon and maple syrup or lemon and sugar.

18. French toast

Similar idea to pancakes but the dipped bread is fried in butter. Also served with bacon and maple syrup.

19. Full English breakfast

Yet another camping staple. We’ll lob in bacon, sausages, baked beans, scrambled eggs, and toast. If we’ve got the gas ring space we might do some hash browns too. No need for lunch after all that!

More camping meal ideas

This is by no means an exhaustive list of what to campervan food to cook but hopefully gives you some ideas and helps you to decide what food items to pack before you leave for a trip.

If you have any favourite camping breakfast, lunch, or dinners, please let us know. We’d love to hear from you.

Happy camping!

Categories
Camping

Easy Paella Recipe – Chicken and Chorizo

Paella is a tasty and filling Spanish favourite that is ideal for a camping meal. Here is our authentic Spanish easy paella recipe with chicken and chorizo. This serves four to six people and takes around 25 minutes from start to finish.

When you’re away from home camping or touring you want to make mealtimes as easy as possible.

Paella is quick and easy to make and absolutely delicious. We find this much more satisfying a meal than say hot dogs and it offers more nutrition too.

What ingredients are in Paella?

  • 400g paella rice
  • 150g marinated red peppers – jar ones are easiest for camping
  • 1l hot chicken stock or vegetable stock – we use 2x Knorr chicken stock pots
  • Pinch of saffron
  • 1 tsp smoked paprika
  • 1 large onion
  • 2 garlic cloves
  • 400g tinned tomatoes
  • 3tbsps olive oil
  • 100g peas
  • 3/4 large chicken breasts (depending on how hungry you are)
  • 200g chorizo
  • 25ml sherry vinegar or wine
  • Chopped flat-leaf parsley
  • Lemon quarters to garnish

This recipe states that it serves four, however, we usually serve six with this without it being stingy on portion size.

How to make paella from scratch

You might be camping but that doesn’t mean you can’t rustle up something just as delicious as you would if you were cooking at home. Here’s how to make homemade paella from the comfort of your campervan kitchen.

Here’s how to make the perfect paella:

Equipment

  • Paella pan or frying pan
  • Chopping board
  • Sharp knife
  • Tin opener
  • Pan for peas
  • Spare large bowl to hold the chicken and chorizo

Preparation

First, prep the ingredients so you have everything to hand:

  • Cut the chicken into 1cm chunks
  • Cut the chorizo into 1cm chunks
  • Dice the onion
  • Slice the garlic
  • Measure out spices
  • Make 1l chicken stock and have it ready to go
  • Pre-cook the frozen peas and have ready to stir in at the end
  • Open the tin of chopped tomatoes
  • Open jar of roasted peppers
  • Cut lemon into wedges
  • Open bottle of white wine or sherry (if using)

Cooking method

Now you have everything ready and to hand it’s time to start cooking.

Heat up 1tbsp of oil in your paella or frying pan. Once the oil is hot cook both the chicken and chorizo until both are cooked through.

Set them aside in a separate bowl to add back to the paella later.

In the now-empty frying pan or paella pan heat another 1 tbsp of oil and wait until it is hot, then place the onions and garlic to cook. Once they have sweated nicely and have turned golden it’s time to add the tinned chopped tomatoes.

Empty the can of tomatoes into the pan and stir. Allow this to cook for a couple of minutes, then stir in the smoked paprika. After a couple more minutes add the paella rice and stir in thoroughly.

Once the rice is evenly coated with the tomato mix, it’s time to add the stock, wine or sherry (if using) and pinch of saffron. Bring the paella to the boil and then leave on a gentle simmer, stirring occasionally. 

This step usually takes around 20 minutes

I find it best to periodically stir the paella as it does start to stick to the pan as the moisture is absorbed. I believe the advice is not to stir, but to shake – like a James Bond martini but we have never found stirring to have a detrimental effect. Our pan maybe isn’t very non-stick?

Once there is little liquid left in the pan and the rice is cooked, it’s time to add back the chicken and chorizo mix.

Cook all together on a low heat for another 5-8 minutes.

The last step is to add the peppers and peas. Stir these in and cook for another 1-2 minutes. 

Turn the heat off and cover with a tea towel for 1-2 minutes then serve.

How to serve paella

We find the paella so filling and satisfying that we don’t add a side dish.

For our chicken and chorizo paella, we simply squeeze over a drizzle of lemon and if we have it, a handful of chopped flat-leaf parsley.

It’s best served into bowls, rather than plates as this seems to keep the heat in the paella better.

Delicious! Our easy paella recipe with chicken and chorizo

Paella – your questions answered

Q – Can I reheat paella?

We do! I had heard that it wasn’t safe to reheat rice, however we have never had a problem in the dozen times we have done this. We make sure the leftover paella has been stored in the fridge and then reheat thoroughly making sure the meat is piping hot all the way through.

The rice ends up more sticky than on day one, but we dont mind. The flavour is still 100% delicious.

Q – Can you eat paella cold?

It’s safe enough to eat Paella cold if it has been stored in the fridge but personally, I would prefer to reheat it. It is supposed to be served as a warm dish so eating it cold seems a bit odd IMO.

Q – Can you cook paella in a frying pan?

Again – we do! As we are in a campervan, you can’t have every bit of kit with you unless it is something you use repeatedly. If you would use a paella pan for a number of dishes such as a risotto or a one pan full English, then it is worth purchasing one. If not, a decent sized frying pan will do.

However if you are thinking about buying a paella pan, this one from Cadac comes highly recommended and is on our wish list. 

Q – Which rice is best for paella?

We typically use “paella” rice to make our paella. This is readily available to buy in the supermarket. Paella rice is made from Redondo (round) or bomba rice. It has a different composition and starch structure to long grain rice, which makes long grain rice unsuitable for making paella.

Redondo or bomba rice can absorb up to three times its weight in liquid which is why we like to use a good quality stock.The rice will take on the flavours in the liquid part of the dish.

Q – Can you make paella with risotto rice?

Risotto or arborio rice is very similar in structure to paella rice. Both types of rice have a high amylose content. This is the starch that acts as a bonding agent in the pan.

By substituting paella rice for arborio or risotto rice it won’t massively change the dish. If you’re camping and making this in your campervan, you’ll think it’s delicious with either type of rice.

Q – Do you cover paella when cooking?

No, you want all the liquid to either be absorbed by the rice or evaporate away. At the very end of the cooking process I cover it and leave it for a couple of minutes to settle. This keeps the rice warm and keeps in that little bit of moistness.

We don’t have a lid for our campervan frying pan so we make meals that don’t need a lid or if we are keeping something warm, we’ll cover the pan with a melamine plate.

Q – Is paella gluten free?

The uncooked rice product is gluten-free. What makes the dish paella NOT gluten-free is the stock used. Often chicken stock contains gluten. The Knorr stock pots we use are gluten-free though. The other gluten source in paella can be in the chorizo. If you need to make this dish gluten-free, seek out gluten-free chorizo too.

Q – Is paella good for me?

Paella rice is low GI meaning it keeps you fuller for longer. This equates to you not snacking afterwards or turning to dessert and ingesting extra calories.

We estimate our paella to contain around 480 calories per serve.

Q – How much does paella cost to make?

We estimate that our easy paella recipe with chicken and chorizo should cost around £13.00 all in. Not bad! When served between four it makes it £3.25 a portion, or £2.15 when split six ways as we do.

Categories
Camping

Campervan Food Essentials: What Food to Take and How to Store It

In this article, we open up our campervan pantry cupboard to discuss our campervan trip food essentials. It is said that an army marches on its stomach – our family certainly does, so food is key to a great trip.

Say the words “campervan trip” and I think flexibility and freedom. There is something magical about a trip away in the campervan that can’t be topped. 

Best of all it’s fun and convenient to be able to park up somewhere and put together a snack or a meal. You might well be wondering what food you should keep your campervan stocked with to aid a quick and easy meal on the fly.

Read on to learn what food we bring and how we keep it safely stored.

Campervan food packing list

Our family enjoys eating, that’s a fact. The kids complain when they’re hungry, that’s another fact.

The food we take in our campervan is a big deal for us. Just winging it isn’t an option.

We also like to have plenty to eat on board so we aren’t forced to have to visit shops all the time. It’s nice if you’re camped up somewhere and hungry that you can just set to and whip something up.

So, we’ve developed a food packing list for our campervan adventures. To make life easy when we’re on a trip we always stock the following items in the campervan.

Pantry items

Our pantry items can be assembled and packed in the days ahead of the trip. As you’ll see below this also involved some measuring and repackaging, so early preparation is important.

Basic ingredients

  • Stock cubes, mixture of chicken, beef and vegetable.
  • Cooking oil – small quantity in well-sealed bottle.
  • Flour – small amount (some pre-measured for pancakes).
  • Sugar – granulated, and sometimes sugar sticks for hot drinks.

Tins, packets, and jars

  • Tins of soup.
  • Super noodles.
  • Crackerbread.
  • Batchelors Pasta n Sauce mix.
  • Dry pasta.
  • Jar of pasta sauce.
  • Jar of pesto.
  • Breakfast cereals.
  • Jam and/or marmalade.
  • Vegemite – we are Aussie after all (no Marmite, thanks).

Hot drinks

  • Teabags.
  • Herbal tea bags.
  • Coffee – granulated, decanted into small sealed container.
  • Hot Chocolate – small jar or sachets.
  • Mini marshmallows.

Treats and snacks

  • Crisps – we love crips and always have a massive range.
  • Biscuits – ditto above comment for biscuits.
  • Tuc/Cheddars/Ritz – or in our case all of them. We also love crackers.
  • Chocolate and sweets – yes very naughty.
  • Cereal bars.
  • Fruit string/Bear Yoyos.
  • Red wine (handy as doesn’t take up space in the fridge).

Condiments

  • Ketchup.
  • Soy sauce.
  • Maple syrup.
  • Salt and pepper.

Perishable food 

In addition to the pantry food, some perishable food is necessary too. We always bring the following when starting our journey.

  • Bread.
  • Eggs.
  • pikelets/crumpets/pancakes.
  • Potatoes.
  • Carrots.
  • Tomatoes.
  • Apples.
  • Bananas.

We don’t store a lot of fruit and vegetables in the campervan or our awning as we find it doesn’t keep for more than a couple of days at best. Our fridge runs extremely cold so anything with a high water content like fruit or vegetables are easily spoiled.

We tend to buy fruit and eat on the day, or use it as part of a pudding. We’ll pick up vegetables or a pre-made salad pack and use that on the day.

The interior of the van does stay nice and cool so any food keeps well for a few hours from shop to plate, even if not kept inside the fridge.

Fridge items

Luckily for us, we have a large 42L capacity chest fridge built into our campervan. Because it’s a chest fridge it means it can be fully loaded to the top. A more conventional front-loading fridge is more restrictive to pack and items easily move about in transit and fall out when you open the door.

The following items are our campervan fridge essentials:

  • Single pints of milk – they are smaller so more versatile. We usually take at least four.
  • Cheese – regular mousetrap, plus one or two more interesting varieties.
  • Butter – always the spreadable variety even though we have blocks of butter at home. This is because the fridge is very efficient and regular butter turns to stone.
  • Yoghurts – individual serves rather than bigger tubs.
  • Ham, chorizo, other cold meats.
  • Bacon – nothing like a cooked breakfast when camping.
  • Two cooked meals for 4 people (to see us through the first couple of days to take the pressure off).
  • Chilled wine and beer – depending on the fridge space left.

We also use a fridge deodoriser, to help soak up smells. We’ve tried out a few, but charcoal bags have been the most effective. We currently use these Jorlyen Air Purifying Bags and keep one in the empty fridge all of the time.

Campervan food storage

To get the longest life out of your food it is best it is stored correctly. How to store your food in a campervan is a personal choice but this is how we do it.

We use Tupperware and lots of it! Tupperware or other plastic food storage containers is fab. It’s stackable, versatile, reusable and unbreakable.

As we like to carry plenty of food on board our campervan, we need to be clever with how we store it.

Pre-bagged portions

Before we leave for a trip we will usually calculate how much of any one item we are likely to need and measure out the required amount in advance.

For example sugar. Rather than taking a whole bag, we’ll measure X amount of teaspoons of sugar into a container or sealable plastic bag. Ditto with the flour, coffee, hot chocolate, and tea bags.

We all like different types of cereal in the morning. To allow for that variety without the volume we will measure the amount we need to save on taking four different cereal boxes.

Yes, I will admit it seems hardcore but I measure out portions according to the packet guidance and individually store each one. That means if someone wants Shreddies, they grab a pre-measured portion and they’re good to go. 

These fab reusable sandwich bags are just the ticket for the job and save on plastic waste.

Pre-measuring portions is quite labour intensive pre-trip, I’ll admit, but it does save on space and simplifies things at the campsite. When there are four of you to feed, these little space-saving tips do make a difference.

Cupboard organisation

In our VW California Ocean we have the luxury of kitchen cupboards and an under-bench seat.

We keep the pots, pans and crockery on the left-hand side of the kitchen, top and bottom shelves. If the rear bench seat is pushed far forwards (to allow for maximum boot space) this cupboard is often inaccessible in transit.

The right-hand side is where we keep most of our food. The cupboards are nice and deep and the shelf dividing the cupboard unit is high enough that you can stack two tins on top of each other.

As we don’t usually need tins when in transit, they are stacked at the bottom of the cupboard and at the back. Anything I may want to access in transit is at the front of each shelf.

We use anti-slip matting to make everything stay where it should be during transit.

Snacks drawer

The under-bench seat drawer is used to house our goodies. I tend to travel in the back when we’re on a trip and I can open the drawer and whip out the snacks.

There is enough room to fully open the drawer even if the bench seat is pushed all the way forward.

This storage space is actually huge and can be used for more than in-transit snacks and goodies. It is also good for kit you might want to get your hands on asap once you’ve arrived on site.

How to store food in a drive-away awning or tent

We’ve learned these lessons the hard way! 

We tend to empty the campervan of a lot of food if we are bringing the driveaway awning. 

This is because if we are on a longer stay we use our Cadac stove for cooking in the porch area of the awning instead of using the campervan stove.

This is a personal choice but because we have two small children in and out of the campervan it feels safer to keep the cooking outside.

As we are likely to be sleeping in the campervan it keeps the cooking smells at bay too.

It makes sense for us to keep the food we’ll be cooking, near the stove so we keep it in the porch area with the cooking equipment.

Crates are great

If you have food in your tent or awning it is best kept in a sealed crate like this one. These are the perfect size and stackable if you have more than one.

Rather than bring a crate specifically for food, we tend to use the crates for something else in transit and empty it and use the contents when we are camped.

It leaves the crate available for other uses such as food storage. Having a lid means the food is kept fresh and no critters are able to get in and have a munch. It’s also handy for keeping the awning nice and tidy.

If you are keeping food in the porch area of your tent or awning, you’ll find the air in the area becomes very damp overnight with dew. Keeping your food items in a sealed crate will mean your food stays dry and crisp.

Exit mobile version