Categories
Camping

Pros and Cons of Campervans and Motorhomes: Which Should You Buy?

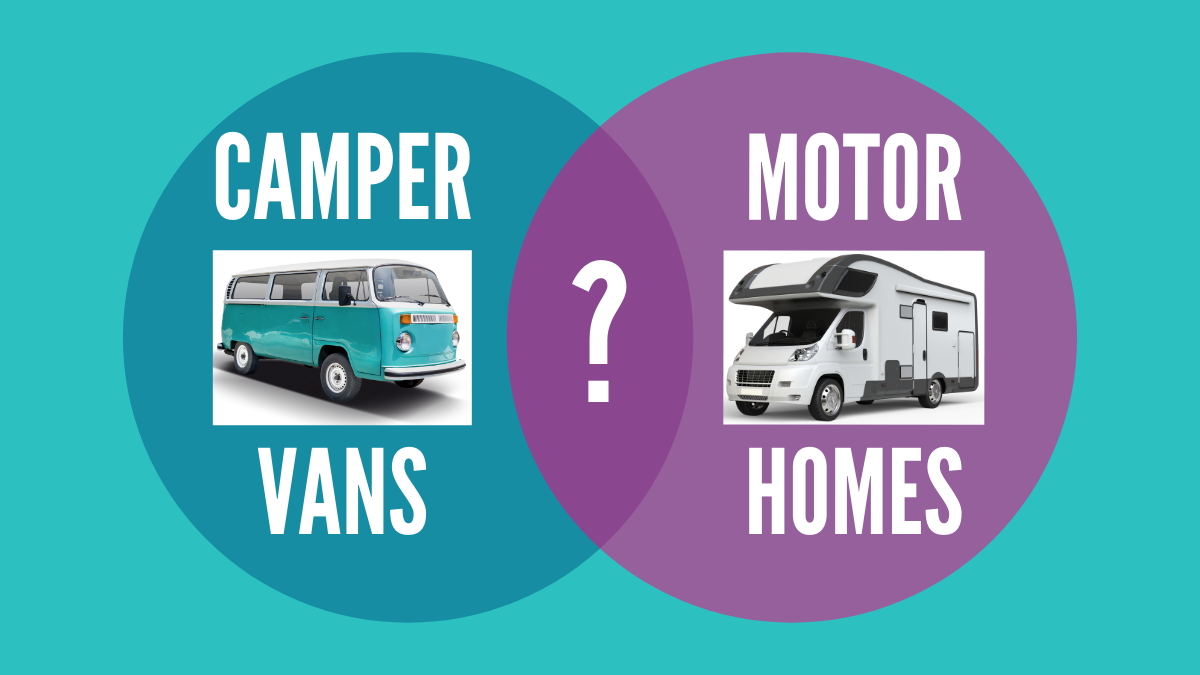
In this article, we look at the pros and cons of both campervans and motorhomes. What advantages do campervans have over motorhomes and vice versa? We help you to decide which type of camping vehicle will suit you.

Touring, camping and day trips in a campervan or motorhome is a great way to enjoy holidays, weekends, and leisure time. Owning a camping vehicle has become more popular over the last few years and this has accelerated through the Covid-19 crisis.

Choosing between buying a motorhome or a campervan is often not so obvious, as both are brilliant vehicles to own and each has their particular merits.

In this article, we consider the benefits of each, as well as the drawbacks, to help you decide whether you will become a campervanner or a motorhomer.

Choosing between a campervan and a motorhome

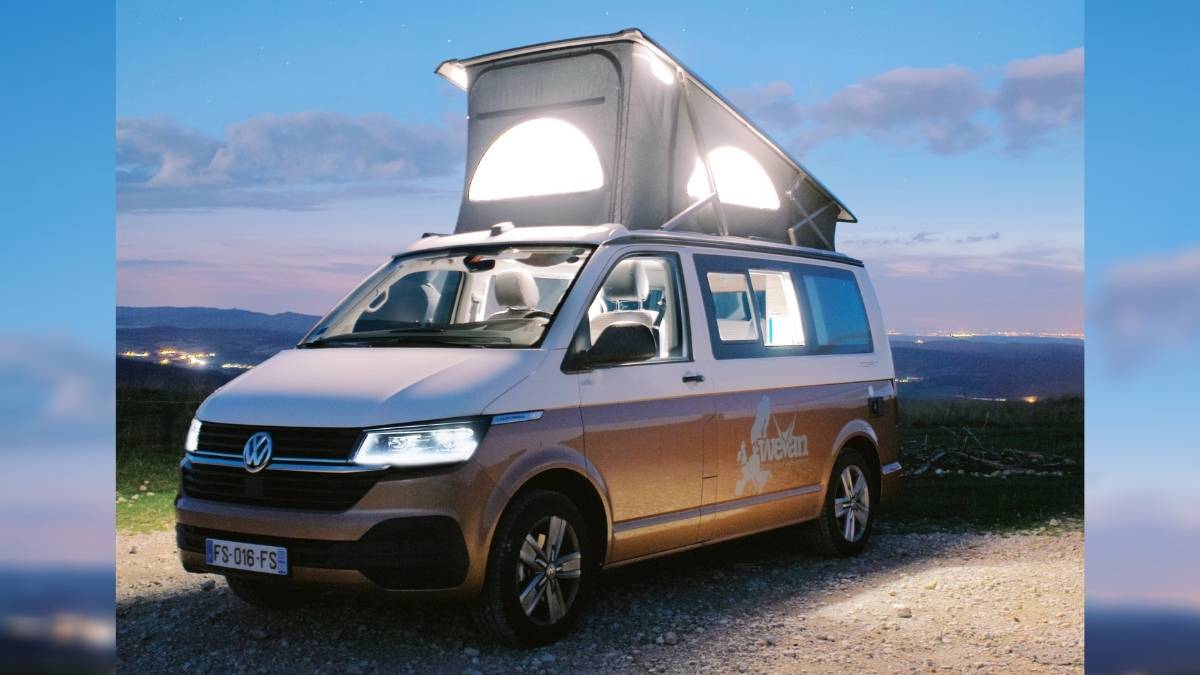
Having our own home-away-from-home on wheels was a dream of ours for a long time. We finally decided on a VW California campervan and haven’t looked back.

There were loads of things that we considered in making our final choice. 

In the future, we may move to a bigger van or a motorhome as our situation changes and we have more time to travel further for longer. But, we were selecting for what works for us right now and for the next few years.

We have two primary school-aged children so needed something that seated and slept four comfortably. We also wanted a vehicle which we could use day-to-day so parking at home was important. 

Although a VW pop-top campervan was ultimately the right choice for us, it wasn’t clear-cut at the beginning. Just like buying a home, some compromises had to be made.

Whether you should get a campervan or a motorhome will depend of course on your personal circumstances and what you want to get out of your van ownership.

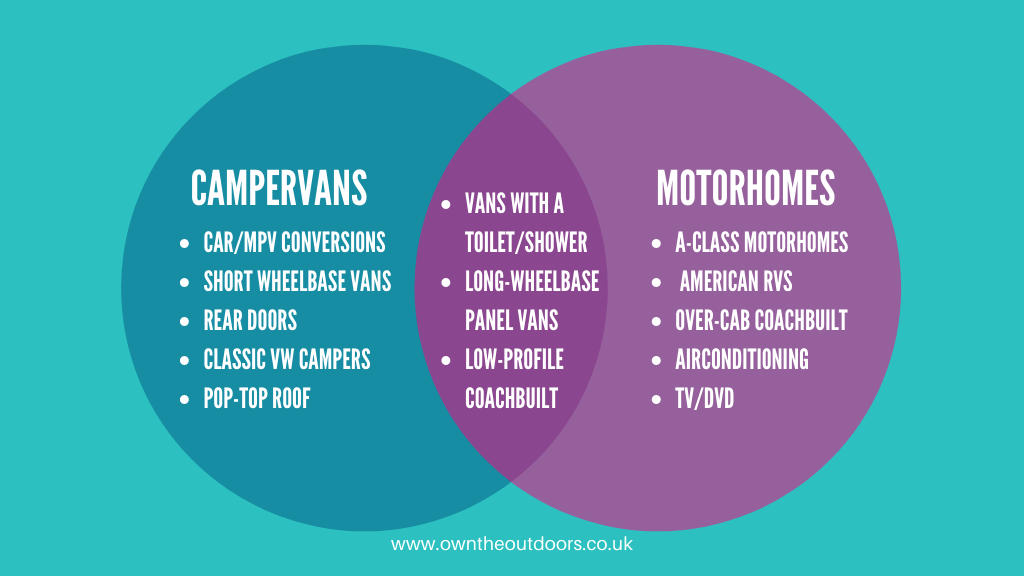
What are the main differences?

If you want to take a deep dive into what exactly defines a campervan and a motorhome, take a look at our article What is the Difference Between a Campervan and a Motorhome?

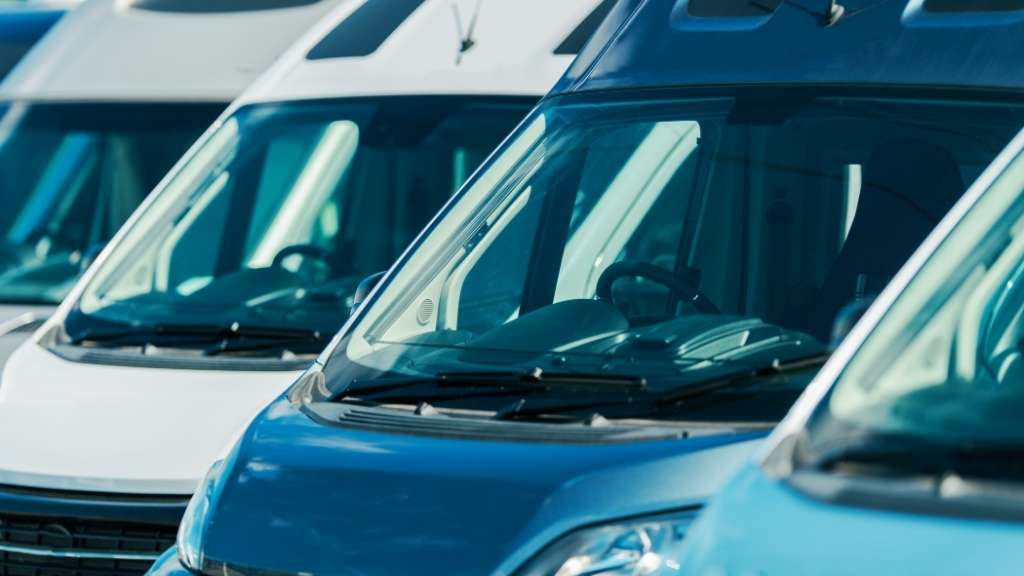
Campervan advantages and disadvantages

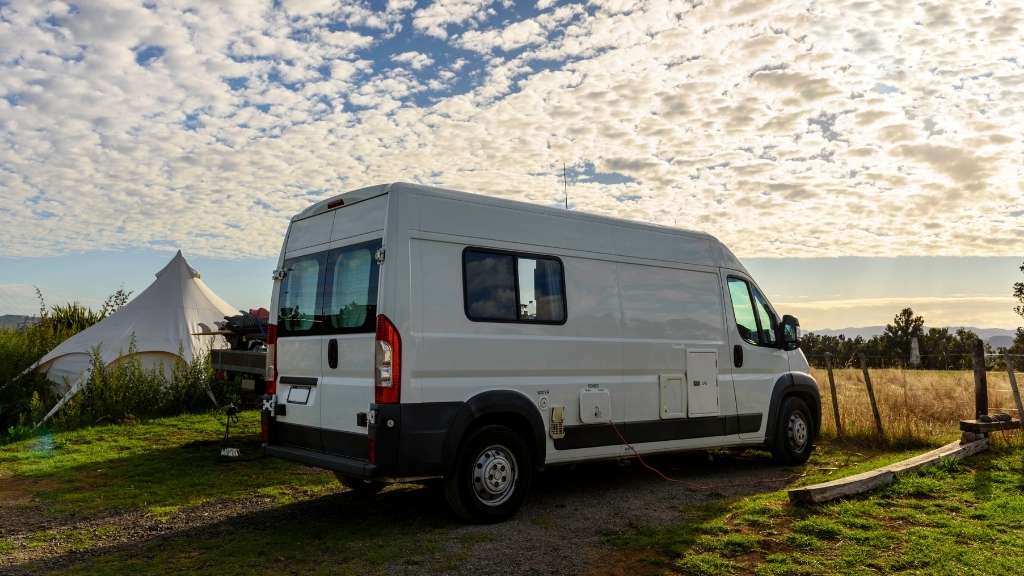
Campervans are generally smaller and have fewer home comforts than their motorhome cousins. They are built within a van body either as a conversion from a commercial van, or factory-built by the van manufacturer.

Smaller campervans, known as micro-campers, use a car or small delivery van as a base vehicle and sleep two. These are easy to park and have lower fuel consumption but may not suit longer touring holidays.

Van conversions are the type of vehicle most people associate with the term campervan. 

They typically have enough comforts to use on camping trips and touring with the benefit of easier parking and day-to-day use than bigger motorhome counterparts. However, limited gear storage and the lack of inbuilt toilet and shower facilities will not suit everyone.

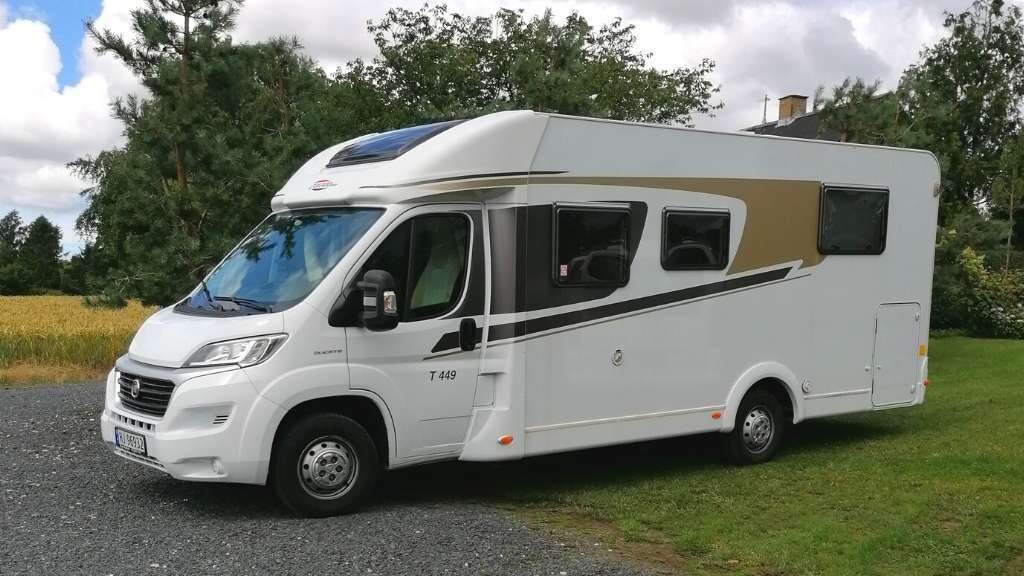
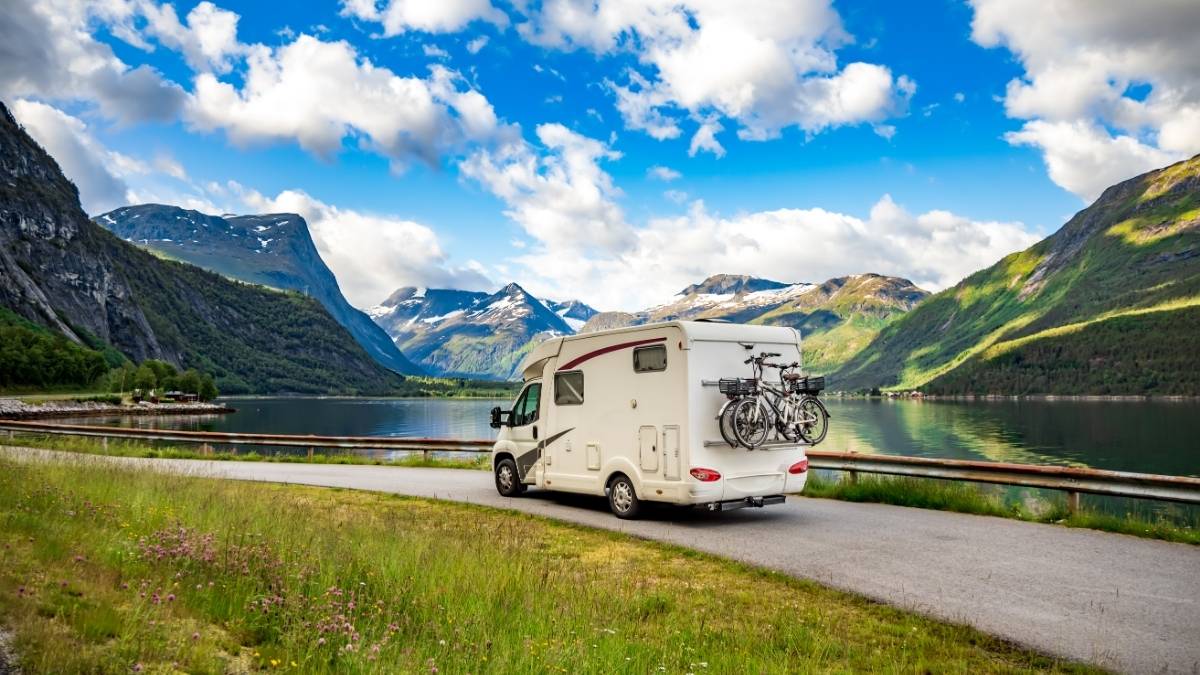
Motorhome advantages and disadvantages

Motorhomes are longer and often wider and are designed to provide a comfortable and spacious environment including built-in washing and toilet facilities.

Motorhomes range in size from 2-4 berth long panel van conversions to American RVs with slideout sides and separate rooms. The typical type of motorhome you’ll see in the UK has a coach-built body mounted on a truck chassis and cab, with berths for 2-6 people.

They are more spacious with a finish and facilities aimed at comfortable living for longer touring and campsite stays. Their larger size brings less flexibility with driving and parking and may require a driving licence for heavier vehicles.

Let’s look at these pros and cons of campervans and motorhomes in more detail.

Driving

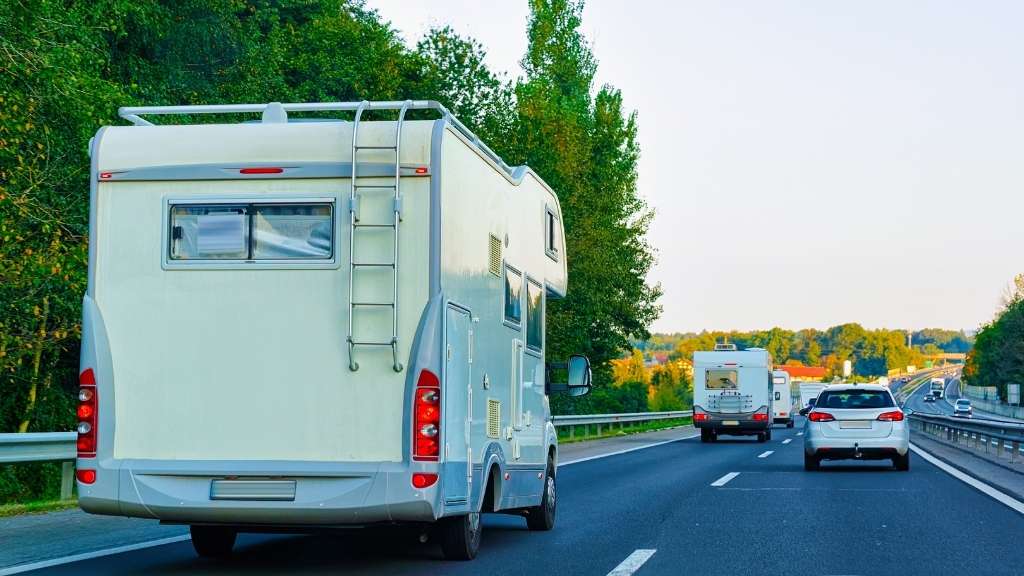
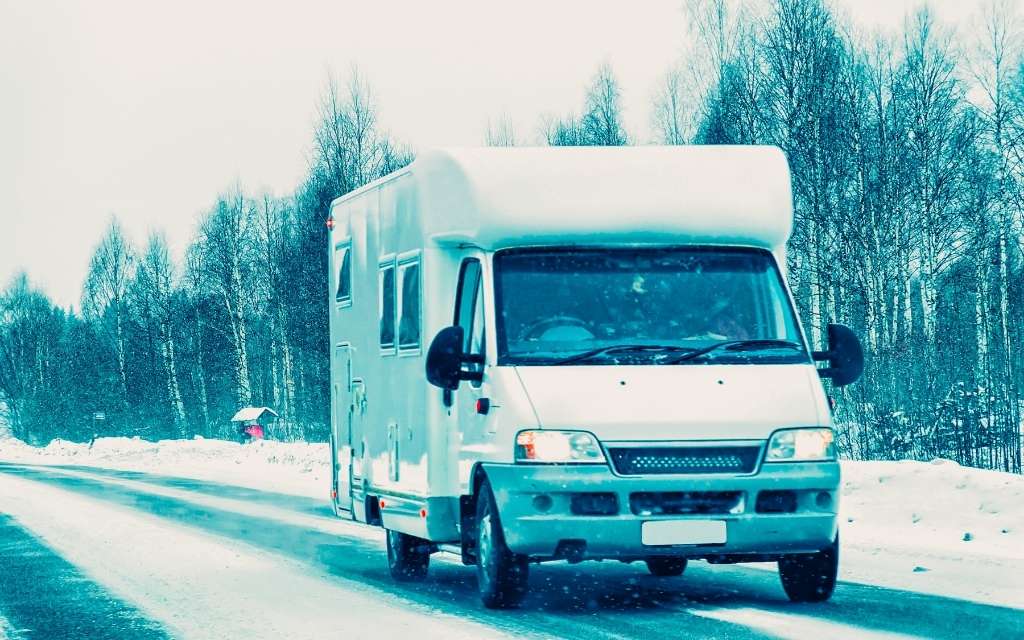
If you are not used to driving a larger vehicle, driving a motorhome or campervan can take some getting used to.

Road handling

These vehicles are heavier than cars and this affects their handling on the road, steering, accelerating, and braking.

Motorhomes, being larger than campervans, can often be a less finessed drive in built-up areas but comfortable on the open road. Campervans will often handle well in traffic, similar to driving a large SUV or estate car, and are often suitable as a daily drive vehicle.

Power steering can make a big difference for both types. Without it, each vehicle can feel, unsurprisingly, like the truck or commercial van it is built on. Similarly, an automatic transmission can make for a smoother ride at lower speeds. Some motoring purists (not me) will always prefer a manual gearshift.

Take as many test drives as you can get away with to really appreciate what each vehicle is likely to feel like.

Visibility

Visibility is more limited than a car with windows all around, so mirrors become even more important. On the other hand, a high driving position on the road allows you a much better view of the traffic and the scenery.

Arguably campervans often have better visibility than motorhomes, as they often have a rear window which can be seen through the rear-view mirror. Some coach-built motorhome designs have a body which is wider than the cab, reducing visibility further.

Driving licence

The standard UK driving license category B lets you drive a vehicle up to 3,500kg in MAM (maximum authorised mass), and tow a trailer up to 750kg (provided the combined MAM is under 3,500kg).

Most campervans and many motorhomes are under 3,500kg so you are covered. Even so, it is important to check the specifics of the vehicle and your driving licence before you buy.

To drive a vehicle between 3,500kg and 7,500kg you will need to have a C1 licence. The good news is for UK drivers who passed their driving test before 1997, the C1 category is automatically included.

If you passed your test from 1997 onwards you will have been given category B licence only. To drive larger motorhomes you will need to pass the theory and practical category C1 driving tests.

Parking

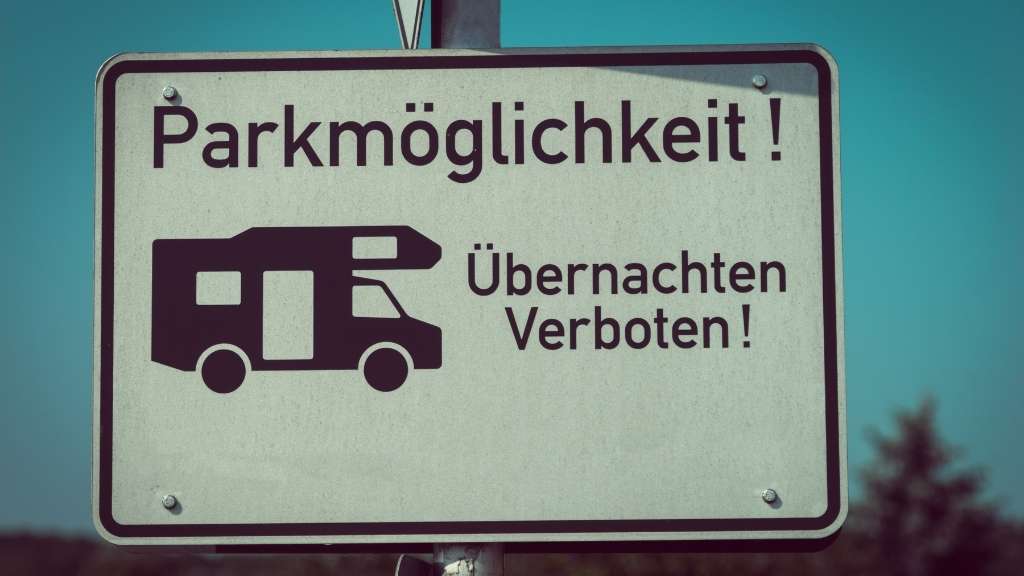
When considering the pros and cons of motorhomes and campervans, parking is an obvious issue.

Motorhomes are generally larger vehicles than campervans, and parking them is a distinct disadvantage.

On a campsite, no problem. Campsite pitches are designed with motorhomes in mind, and all but the largest RVs are able to be comfortably parked.

The footprint of a regular short-wheelbase campervan is similar to a large car and will fit standard parking spaces, albeit sometimes a little snugly. Van conversions of medium and long-wheelbase panel vans are a different matter. You may find yourself parking in the outer reaches of supermarkets car parks across two spaces.

Visiting the supermarket or town centre in a motorhome can cause parking issues. You may have to find generous street parking spaces nearby and walk to your intended destination rather than stubbornly squeezing in.

Height restrictions

Remember there are three dimensions that matter with any campervan or motorhome. As well as length and width, the height is critical when parking. Many a leisure vehicle driver has fallen foul of an overhead height restriction barrier.

Speaking from personal experience, I once forgot that using the bike rack on the back of our van increased the height, and hit a height barrier at an outdoor car park in Staffordshire. Luckily there was no damage to the van, only superficial damage to the bikes, and a mildly bruised ego.

Motorhomes will very often exceed the common two-metre height limit in outdoor and multi-storey car parks, further reducing your parking options.
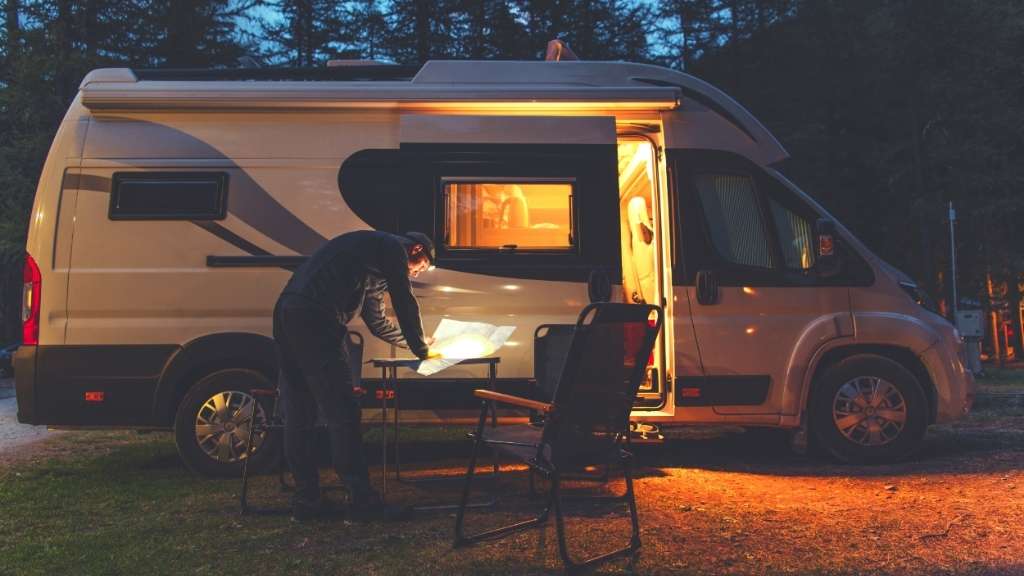
Camping

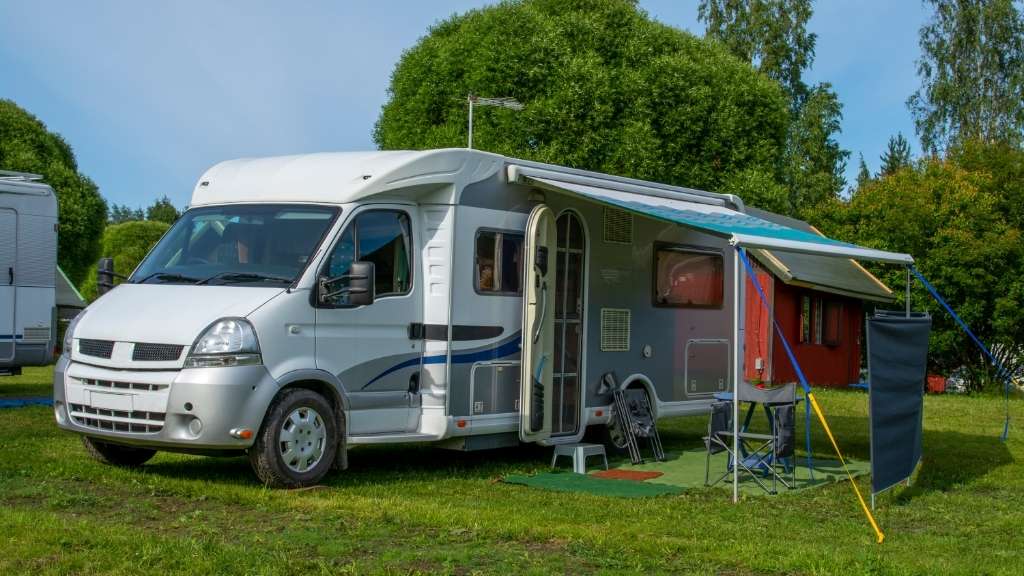
These vehicles are, obviously, designed for camping. Let’s look at the pros and cons of campervans and motorhomes when setting up and staying at campsites.

Getting set up

Setting up camp in a motorhome is easy.

After parking and levelling, you need only plug into the electric hookup and perhaps water supply, and you’re done. You may want to set up an awning or annexe for extra space, but these are very much optional.

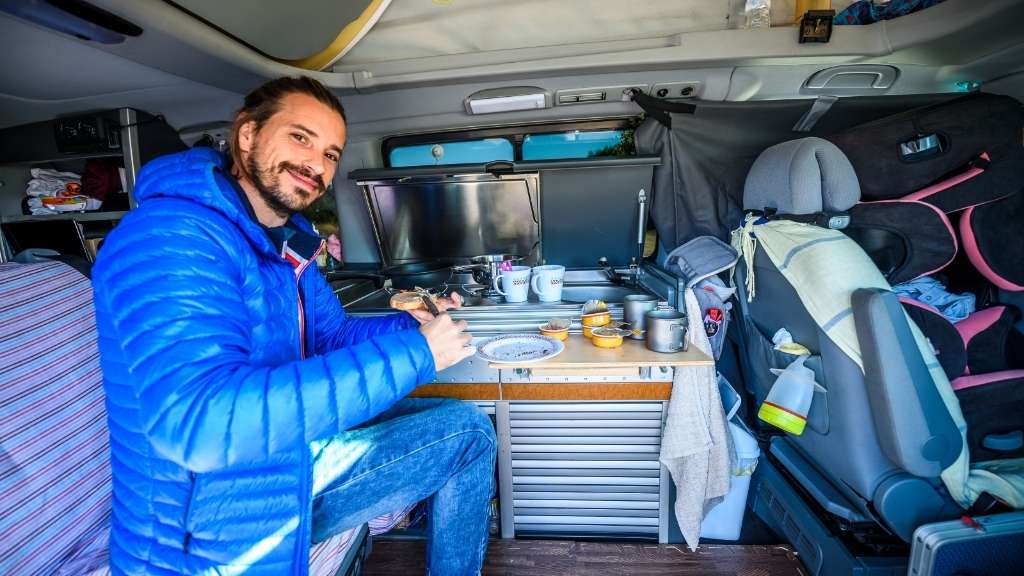
Campervans are a little more work to get set up at a campsite.

They will commonly have a day mode and night mode setup. Day mode for using the living space as a sitting room and kitchen, and night mode converting seating into beds. Longer wheelbase vans often have a fixed bed which makes things a little easier.

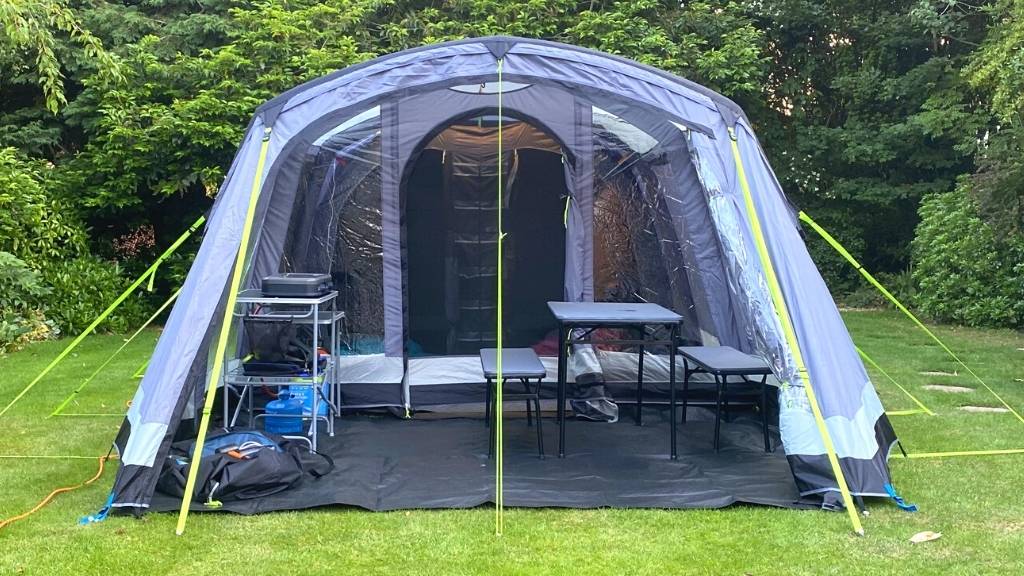
If you have a lot of gear or more than two people you will likely have to use a drive-away awning to store excess gear so that you can set up beds. Pop-top roofs give more head height for living and cooking, and very often have a pull-down bed too.

Sleeping

Of critical importance is how many berths your need.

Campervans are usually designed to sleep 2-4 people. Motorhomes can range from 2-6 berths, depending on the particular design. Giant RVs can often sleep up to 8.

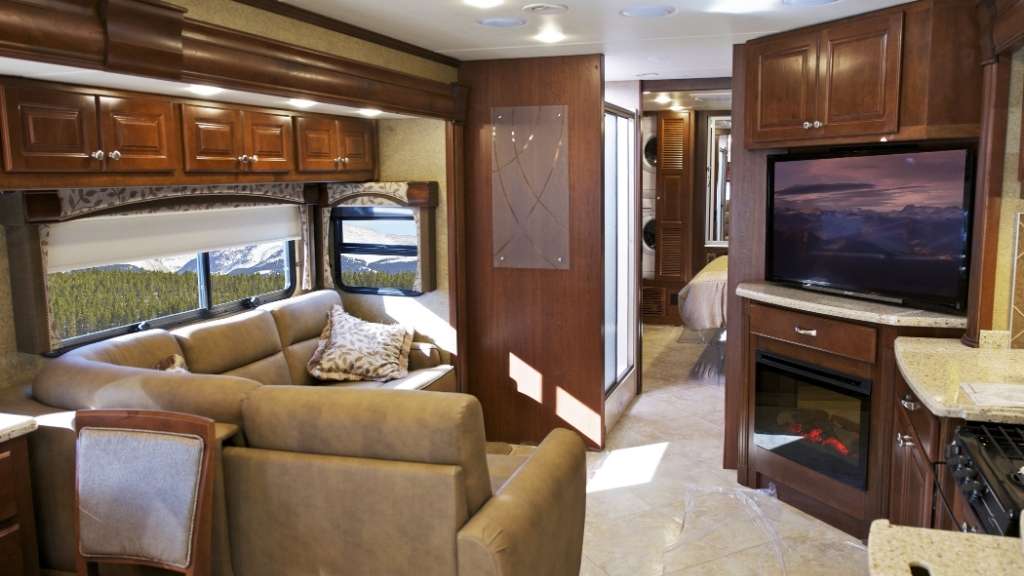
Motorhome beds are designed for home-from-home comfort. They will usually have a fixed double bed or two singles towards the rear, with sprung mattresses.

Additional beds can be above the cab or in the living area, requiring some setting up. Beds made up from seat cushions in the living area are not always comfortable for adults, but for small children they are cosy.

Campervan beds can range from rudimentary ones where you might feel a seatbelt buckle in the wrong place, to sprung bases and super-soft mattresses with memory foam mattress toppers.

Washing and toilet facilities

Inbuilt washrooms typically contain a shower, mini washbasin, and a toilet that can be turned out of the way. They save the need for a late evening dash to the campsite ablution block and are handy when travelling too.

The downside of built-in toilets is that they need to be emptied. The more they are used, the more often a trip to the waste disposal is necessary.

Campervans without toilet/shower arrangements don’t have the waste disposal problem but require a toileting solution when not on a campsite with facilities.

We pack a portable chemical toilet (Porta Potti 335 portable toilet) for longer stays and always carry our fold-up camping toilet (Carplife Bivvy Loo) for on-the-road and overnight use.

To some, campervans feel like camping in a metal tent contrasting with motorhomes that seem like a posh caravan with a motor.

The type of camping experience that suits you will ultimately guide your decision.

Motorhome storage

As with parking when in use, storage is an important factor in the pros and cons of campervans versus motorhomes.

Security

An important consideration when we purchased our campervan was parking at home.

Our previous house did not have a driveway and we weren’t keen to leave an expensive motorhome parked on the street. This put us off buying a van until we moved to a house with a suitable driveway.

Although the van is parked on our property we have taken various security precautions to protect it from theft (not telling which).
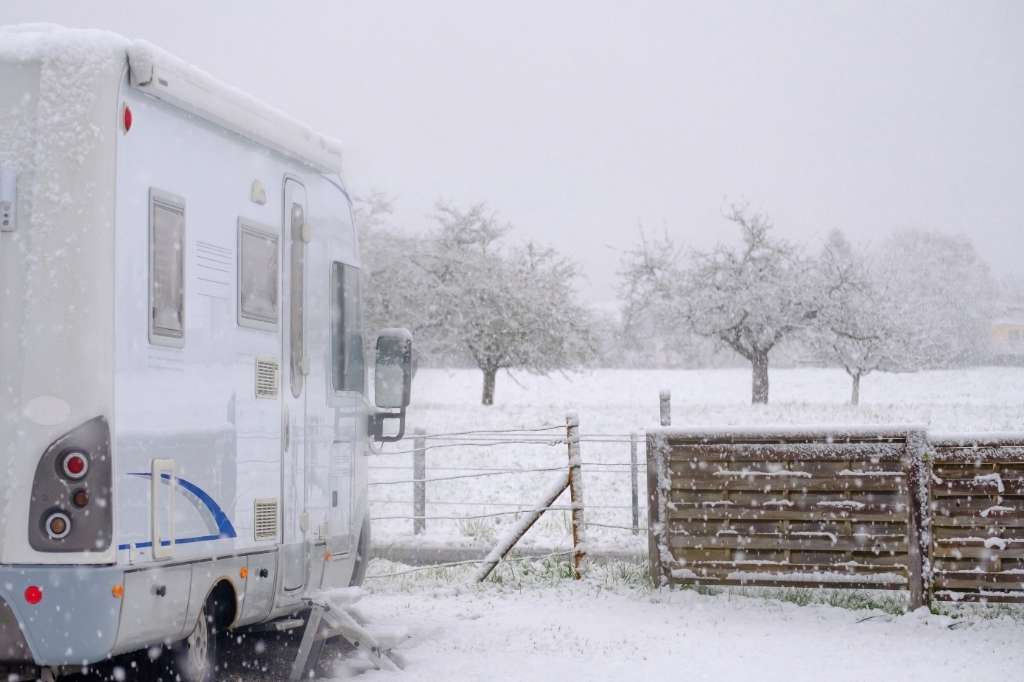
Winter months

Motorhomes which are not used over the colder months are vulnerable to damage from moisture and freezing. Many motorhome owners will winterise their motorhome to keep it safe while it is not in use.

If your campervan is your daily drive and used regularly then winter storage is less of a problem. Emptying fresh and grey water tanks is still essential to avoid expensive damage from freezing.

Offsite storage

Larger motorhomes may simply not fit inside the property or a garage. Many motorhome owners store their vehicles in offsite storage facilities. These can usually be found in rural areas where the farmer has dedicated open storage or undercover storage for caravans and motorhomes.

Money

At last, we come to the big one – how much is all of this going to cost you?

Purchase price

Motorhomes and campervans are expensive assets.

A recent model used motorhome will set you back a minimum of ÂŁ20-ÂŁ25,000, and the price goes up to well over ÂŁ100,000. Large American RVs can be as much as ÂŁ250,000, but to be fair they are like a proper house on wheels.

Campervans are usually a cheaper option. A new conversion on a recent model or new base van will not give much change out of ÂŁ30,000, but older vans can be picked up more cheaply.

Factory-built campervans such as the VW California and Mercedes Marco Polo start from around the ÂŁ60,000 price point and go up depending on the options selected.

You also have the option of creating your own campervan. Buy a base van and pay a converter to fit it out or do it yourself and get specialists to do the tricky bits.

A DIY campervan means that you get to select just how much you are prepared to spend. You can even improve the van in stages, spreading out the cost.

Insurance

Oddly enough, insuring a motorhome or campervan is often cheaper than insuring a normal car. Like all insurance, it pays to shop around. Always pay close attention to the level of cover, exclusions, and excesses involved.
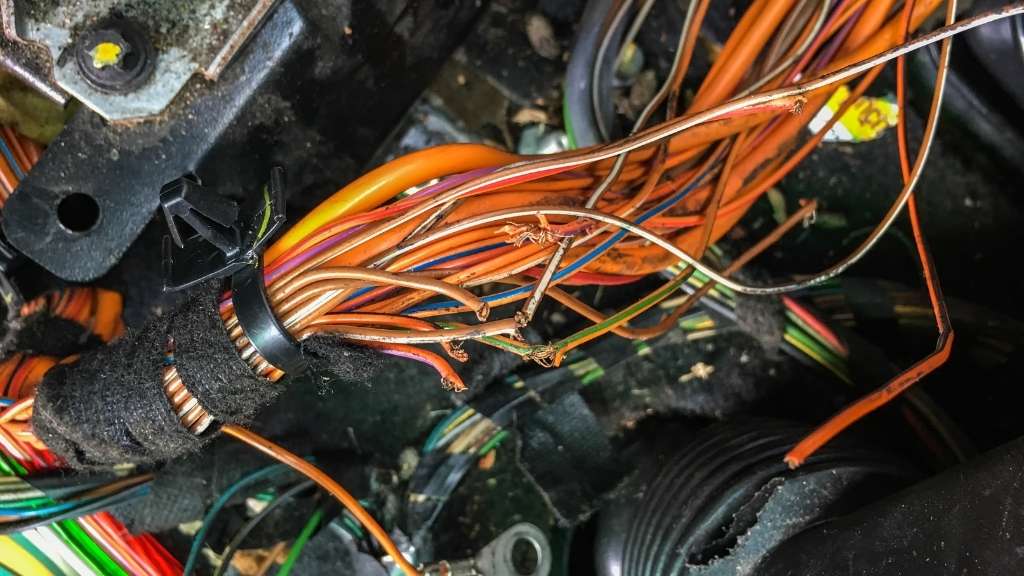
Service and repairs

The cost of servicing, repairs, and spare parts can be more expensive than regular cars.

Servicing costs can be higher as you are servicing a commercial vehicle. On the repairs and maintenance side, there is a lot more to break or wear out. Just consider the facilities for cooking, sleeping, bathroom, water, gas, electrics, and so on.

Campervans will often have lower servicing and repair costs than motorhomes. They are smaller vehicles with fewer additions, but it will depend on your vehicle including any warranty requirements. 

Fuel costs

Motorhomes are heavier and will generally cost more to run than campervans.

All this depends on the fuel type, engine efficiency, and load that you are carrying. Pay close attention to the manufacturers’ figures and add at least 20% for real-world conditions.

Tax and MOT

Road tax, or VED (Vehicle Excise Duty), applies to motorhomes and campervans just as it does with cars.

The VED system has had several changes over the last decade. Costs will vary depending on the age of the vehicle, fuel type, and emissions. Additionally, a vehicle with an original list price over ÂŁ40,000 will attract an additional ÂŁ325 per year for five years.

VED rates were due to change from March 2020 to be in line with commercial vehicle rates. This would have been a very expensive change. Fortunately, this proposal has now been scrapped.
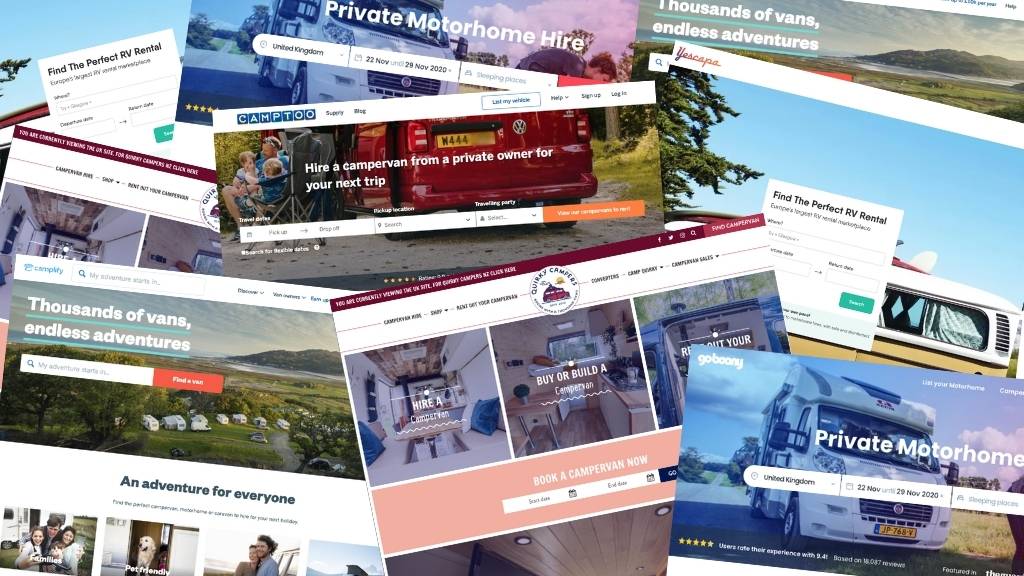
Try before you buy

I highly recommend hiring both a motorhome and a campervan to properly experience what will suit you. We did this on numerous holidays over several years and learned a lot.

How easy was it to drive? Did you sleep well? How was cooking a meal on a two-burner stove? What was it like to drive? What were the best and worst aspects?

Hiring first before you make a very expensive purchase may just save you from making a costly mistake.

You can hire campervans and motorhomes from commercial hire companies, or from private owners. Read about this in more detail in our Guide to Campervan Hire in the UK.

Should you buy a campervan or motorhome?

Now that you’ve gone through the major pros and cons of campervans and motorhomes, there’s a good chance that you know which way you’ll go.

Whether you choose a campervan or motorhome for your camping life, we hope that you’ll enjoy the freedom and flexibility as much as we do.

Categories
Camping

What is the Difference Between a Campervan and a Motorhome?

What exactly is the difference between a campervan and a motorhome? Seems obvious, or is it? We take a detailed look to try and answer the question once and for all. 

The terms campervan and motorhome seem to be often used interchangeably. They are after all both leisure vehicles that provide transport and accommodation in one.

We’ve been to motorhome dealers and hire firms that refer to all of their vehicles as “motorhomes”, but go on to talk about the features of their amazing “campers” or “campervans”.

Let’s get down to it and have a red-hot go at nailing down the issue of how to tell the difference between a campervan and a motorhome.

Definitions of campervan and motorhome

A sleek modern motorhome (by Brent Mikkelsen on Unsplash)

Let’s start with some definitions.

Before we examine their differences in more detail, we’ll set out a formal description of the terms “campervan” and “motorhome” as they are generally used in the UK, Australia, New Zealand, and various other countries.

What is a Campervan?

A campervan is a van that has been fitted out to be a camping vehicle. Campervans are built using a panel van body as a base, not only the chassis. They typically contain one or more fold-out or pop-up beds, gear storage areas, and often have basic kitchen facilities like a gas stove, sink, and fridge.

There is usually no separation between the driving cab and the living area, and most campervans do not have a built-in shower or toilet.

What is a Motorhome?

A motorhome is designed to be a fully self-contained travelling and living vehicle. They are usually manufactured using a truck or bus chassis as a base with a custom-made body attached (coach-built). Some motorhomes keep the cab intact, and others do not. 

Motorhomes have kitchen and bathroom facilities, and some have fixed beds. A motorhome is usually longer than a campervan and is more likely to contain home comforts such as airconditioning and television.

Motorhome and Campervan differences

Now we’ve defined them, let’s compare the features that are typical of each type of leisure vehicle. 

FeatureCampervanMotorhome
Base vehicleVan or MPV carVan, truck, or bus
Body typePanel van or car bodyCustom-made body
LengthUp to 6 metres5 to 12 metres
Separate cabNoSometimes
Side doorUsually slidingUsually hinged
Berths2-42-8
Pop-top roofYes, but not alwaysNo
Folding bedUsuallySometimes
Fixed bedSometimesOften
Storage cupboardsYesYes
Cooking facilitiesUsuallyYes
Gas tankUsuallyYes
FridgeOftenYes
SinkOftenYes
Water tankOftenYes
Waste-water tankOftenYes
Storage cupboardsYesYes
Shower/toiletNot usuallyYes
Electric hookupOftenYes
AirconditioningNoOften
TV/DVDSometimesOften

Using this table will help you decide the campervan versus motorhome question for most vehicles. But, there is some overlap so it’s a question of looking at the whole picture.

Are we there yet?

Motorhome or campervan?

No, we’re not quite there yet.

Like most rules, there are exceptions. Our definition isn’t perfect by any means, so let’s take a look at what some of those exceptions are.

Low-profile motorhomes

In recent years a very popular type of motorhome in the UK and Europe is what is known as a “low-profile coach-built motorhome”.

These have a slimline roof and sleek proportions which resemble a long-wheelbase campervan.

In our humble opinion, these vehicles have a foot in both camps. They have a custom-built body but the proportions of a larger campervan.

Long-wheelbase panel van conversions

Similarly, some campers are built using a long-wheelbase panel van body, but with motorhome comforts such as a shower/toilet room and fixed bed.

They could be a campervan but also a motorhome. Maybe both?

Other examples

A few more examples of hard-to-categorise campervans/motorhomes:

  • A short wheelbase van with a washroom. Does that make it a motorhome?
  • A bus kitted out with beds, kitchen, bathroom, storage, and so on, uses the original bus body. Is it therefore considered a motorhome?
  • A long wheelbase, high roof panel van with the kitchen installed laterally, blocking access to the driving cab. Campervan or motorhome?
  • What about an old ambulance carefully converted to a very comfortable camping vehicle?
  • A four-wheel drive with a kitchen in the back and a pop-up roof bed on top. Is that a campervan, motorhome, or just a car?
  • A fifth-wheeler motorhome that detaches from the cab. Is it even a motorhome?

Exactly how each of these vehicles fits the category of motorhome or campervan is debatable. 

What are Class A, B, and C motorhomes?

Interior of a Class A motorhome

The description and differences we’ve set out above relate to the types of motorhomes and campervans commonly found in the UK, Australia, New Zealand, and Europe (albeit by local names).

The motorhome classes A, B, and C are derived from the North American RV market. 

RV stands for Recreational Vehicle, and is a generic term that includes motorhomes of all types and sizes. It is most associated with the very large bus-size vehicles which often have slide-out sections to widen the interior space when camped.

In the US and Canada the motorhome world is quite different, with very large and often luxurious motorhomes up to 45 feet long a much more common sight.

The best known of these is the Winnebago brand, although they also make a range of smaller vans too and started out making campervans.

The US motorhome classification system

  • Class A: The largest and longest RVs, with the most comforts and highest price.
  • Class B: What we would refer to as a campervan in the UK or a camper in the US/Canada.
  • Class B+: A larger version of Class B, often with a shower/toilet room.
  • Class C: Motorhomes larger than classes B/B+ with a coach-built body and a semi-integrated cab.

These class descriptions are sometimes referred to by UK dealers, but inconsistently.

The exception to this is Class A or A-Class motorhomes, which is the term used for the large and long end of the market.

Does the campervan/motorhome difference matter?

No, not really.

In this article, we are just talking about terminology. The terms are frequently used interchangeably, or a campervans are simply seen as small motorhomes.

Some motorhome owners would be horrified to have their vehicle called a campervan, and similarly, some campervanners see themselves as driving something very distinctive from (and way cooler than) motorhomes.

Exactly what your holiday-home-on-wheels is referred to doesn’t make any practical difference, however, there are definite advantages and disadvantages of owning a campervan over a motorhome and vice versa. We discuss this in detail in our article Pros and Cons of Campervans and Motorhomes: Which Should You Buy?

Where the difference between motorhomes and campervans may be thought to matter are for DVLA road tax, driving licence, and insurance purposes.

(But they don’t really).

DVLA – road tax

Road tax, or its proper name Vehicle Excise Duty (VED), is charged to the vehicle owner.

The terms motorhome and campervan are not used by the DVLA. Instead, these vehicles are called “motor caravans”.

To be a motor caravan a vehicle must meet certain criteria which include sleeping accommodation, sleeping, cooking, storage, and seating facilities. As such, some more basic campervans don’t qualify. 

The VED rates are set according to weight and engine size, and when the vehicle was first registered. It doesn’t matter whether the vehicle is considered to be a campervan or a motorhome.

Driving licences

Again, the motorhome/campervan distinction is not directly related to driving licences.

The type of driving license you need to drive a motorhome or campervan depends on the vehicle’s Maximum Authorised Mass (MAM).

You can drive a campervan or motorhome up to 3,500kg on a standard Category B licence. Larger motorhomes will require a Category C1 (3.5-7.5 tonnes) or Category C (over 7.5 tonnes) licence. 

Insurance

Insurance on campervans and motorhomes is generally cheaper than standard car and commercial van insurance. If you convert a van into a campervan you need to register as a motor caravan to qualify for motorhome insurance.

Ferry and train transport

Fares are generally cheaper for personal use vehicles such as campervans and motorhomes than for commercial vehicles. As with insurance, it is important to have a change in status registered with the DVLA.

Categories
Camping

Easy Tasty Spaghetti Bolognese: Camping First Night Recipe

This popular dish is a winner for the first night meal on a camping trip. Our easy tasty spaghetti bolognese recipe will provide plenty of sustenance for tired campers after a long day.

Spaghetti bolognese is nearly always our first choice when planning our first-night camping dinner.

After a long journey and maybe setting up in challenging conditions we need to be able to rely on a quick and easy solution. People are likely to be hungry so being able to turn out a satisfying, tasty and quick meal is crucial.

This meal takes too long to do properly in the campervan and instead it lends itself to be cooked at home first and brought along in the fridge.

The bolognese sauce will keep for a few days if stored properly so if some other option crops up for dinner on night one, it doesn’t matter.

Here is our recipe for an easy, tasty spaghetti bolognese.

How to make homemade spaghetti bolognese the easy way

This recipe is easy but it’s not particularly quick. This is mostly due to the simmering time involved and not the active participation of the cook.

It’s easy because there is little skill involved in making the dish and it doesn’t matter much if you cook parts for longer or leave out a minor ingredient. It’ll still be delicious at the end – it’s not Masterchef after all.

What you are after is something tasty and nutritious after a busy day enjoying the outdoors. Follow our step by step recipe and that’s what you will have.

Ingredients

Some of these ingredients might surprise you like adding milk and using half-beef and half-pork mince, but the end result really works!

  • 250g beef mince
  • 250g pork mince
  • 4 rashers smoked bacon or pancetta (approx 120g)
  • Large onion (approx 160g)
  • 1 carrot (approx 80g)
  • 1 celery stick (approx 80g)
  • 400g tin chopped tomatoes
  • Tomato puree
  • 100ml milk
  • Oil

Again, if you add a little more or less of this or that it doesn’t make a huge difference overall.

Extra additions you can make include white wine. I don’t add this as my kids spotted me adding it once and then refused to eat it. I haven’t noticed much difference in the flavour with or without wine, so I tend to leave it out.

Equipment needed

  • Chopping board
  • Large knife
  • Large cooking pot
  • Measuring jug for milk (or roughly guess 100ml by eye if you know a pint is 568ml)

That’s it, easy! Now we’re ready to cook.

Step by step spaghetti bolognese

Preparation

Get all the ingredients prepped in advance.

First, chop up the vegetables. I tend to cut mine really small to hide them – we have a fussy eater in the house. If you don’t have this problem, dicing is good enough.

Next, chop up the bacon into small pieces. The bacon is there to add a bit of salt and smoky flavour to the spaghetti bolognese.

Last, measure out the milk. Do this now rather than adding by eye later, so that it is on hand when you need it.

Cooking method

Step 1. Heat a little oil in a large cooking pot. Once it’s heated up, add the bacon or pancetta, whatever you are using. Fry the bacon until it starts to crisp up and looks golden.

Step 2. Add the beef and pork mince. Fry this with the bacon until the meat is all cooked through and there is no raw meat left.

Step 3. At this point, add the onions, carrots and celery and cook until they are tender.

Step 4. Add the milk and simmer for 10 minutes. You can walk off and do something else at this point. Keep the pot on low heat, just enough to simmer.

Step 5. After 20 minutes or so, it’s time to add the tomatoes and tomato puree. Stir these in well and bring back to the boil.

Step 6. Once the bolognese is boiling again, turn it straight back down to a simmer and leave it for 30 minutes. Stir occasionally to make sure it isn’t sticking at the bottom. If it is sticking, the heat is too high.

Finito!

After 30 minutes or so, more or less, it doesn’t much matter, turn the heat off and put the lid on. Leave it to rest and cure further until it has cooled.

When sufficiently cooled either put it in the fridge, take some to heat back up for dinner, or separate into two-person portions and pop straight in the freezer. Job done!

What I like about spaghetti bolognese is you can multiply the ingredients and make a mega-batch. I always do this because to me it makes sense.

If I am going to the trouble of creating the dish and all the washing up associated with it, why not make many portions at once and freeze them?

Spaghetti Bolognese as a first night camping dinner

So with our bolognese sauce all ready to go, all that remains is the pasta. I supposed this dish should really be called pasta bolognese as we rarely use spaghetti. This is mostly because penne or fusilli is easier for our kids to eat. 

We boil a large pot of water with a chicken stock cube dissolved in it and add 80g of pasta per person. When you’re away in the campervan you are unlikely to have weighing scales at your disposal, I know we don’t, so instead I use handfuls or cupfuls. I know by eye how much we eat as a family of four as I’ve done it so often.

I use a stock cube in the cooking water as it gives the plain pasta just a little more flavour.

In choosing the pasta, we tend to go for wholemeal instead of white pasta. I just substituted the white pasta for wholemeal one day and the kids didn’t notice.

White pasta has been stripped of many of its nutrients and fibre as it is so processed. We find wholemeal pasta has more flavour too.

There was a time when we went through a phase of buying fresh pasta. We have found that dried pasta is hardly any different and has the obvious added benefits of having a long use-by date and is cheaper.

How to serve spaghetti bolognese

We like to serve our spaghetti bolognese in bowls, rather than on a plate as it helps to keep the heat in the meal for longer.

If we have parmesan cheese on hand, we’ll sprinkle some on top of the spaghetti bolognese. Our kids like double cheese – grated cheddar and a sprinkle of parmesan.

It’s unlikely we would have basil if we were camping in the campervan but if we eat this meal at home, I’ll liberally decorate it with basil too.

This recipe makes a not-particularly-salty version of spaghetti bolognese so I would also recommend adding salt and pepper to individual plates that prefer a bit more seasoning (that’s me). Our kids don’t like meals which are too salty and neither is it good for them (or any of us!) so we tend to keep our meals relatively low-salt.

Spaghetti Bolognese Q&A

Q – Why put milk in bolognese sauce?

Good question! I had previously never made a bolognese sauce with milk in until one day I was taught otherwise by a gourmet cook friend of mine.

The answer seems to be two-fold. One – it helps to tenderise the meat and two – it takes the acidic edge off the tomatoes. It also makes the bolognese sauce have a creamier, less dry texture.

Q – Is spaghetti bolognese healthy?

Spaghetti bolognese isn’t the lowest calorie meal option out there but it is a relatively healthy choice.

In terms of calories, the pasta alone in an 80g serving size will be around 265 calories. You can expect a portion of bolognese sauce to have around 306 calories so 565 total calories including the pasta. Add cheese and you can be up nearer 650 calories.

As it is one of your three main meals of the day, that’s not terrible. A pasta dish containing cream, such a carbonara, has a lot more calories.

Q – Wholemeal pasta or white pasta?

In relation to the children, we don’t tend to think in terms of calories anyway, just overall healthy choices and we eat what they eat.

We add healthy alternatives where we can. For example wholewheat pasta over white pasta, low-fat mince, usually 5% only. Half-beef and half-pork mince make for less saturated fat overall. We add plenty of vegetables too so the meal is well balanced, and don’t add too much salt.

None of these substitutes cost the meal anything. It is still extremely tasty and always a popular choice with the kids.

Q – Should you have a lid on when cooking bolognese sauce?

No. I keep the lid off and allow the liquid to evaporate. I will put the lid on once I turn the heat off and allow the sauce to keep its heat a little longer and cure further.

Q – Can you freeze bolognese sauce?

Absolutely you can and I do this all the time. When the sauce has properly cooled I’ll measure out portion sizes – typically 650g for our family of four and freeze in suitable freezer bags. These reusable ones are great for that. If I am doing two-person sizes, I’ll half that amount. It means you can defrost exactly the amount you need, so there’s no waste.

Q – Can you cook spaghetti bolognese from frozen?

I have tried this and I have to say it is always easier to have let the bolognese sauce thaw first. If you have a couple of frozen lumps, no problem to finish them off with the heat. 

If you are in the position where you are cooking with a frozen parcel of bolognese sauce though, heat it up on the stove with a very gentle heat underneath. Allow plenty of time for it to cook this way.

You want to have the fully thawed sauce boiling for 5-8 minutes to make sure it is reheated right through.

Categories
Camping

Easy Bacon and Pea Risotto Recipe: Camping Dinner Sorted!

This traditional Italian dish is a straightforward and satisfying meal for camping or at home. Our bacon and pea risotto will satisfy most campers and is guaranteed not to have any leftovers.

There is something about the teaming of bacon and pea that is just simply delicious. The salty bacon and the sweetness of the peas – yum!

This recipe is a quick and easy option which you can make in your campervan or tent to serve four people. It is kid-friendly so is always a staple on our menu.

It is very similar in nature to paella but even easier and quicker to make. Nice to vary it up when away on a trip.

How to make the perfect bacon and pea risotto

This is a one-pot meal which can be cooked in a campervan, on a camping stove, or over a campfire. Only six basic ingredients are required.

Ingredients

  • 1 onion
  • 6 rashers smoked streaky bacon
  • 300g risotto rice
  • 1L chicken or vegetable stock
  • 100g peas
  • Olive oil (or any other type of cooking oil you have)
  • Parmesan cheese to sprinkle on top (optional)

We tend to buy ready-grated parmesan. Parmesan is a hard cheese to grate and the extra you pay for having it pre-grated is definitely worth it. Also saves on washing up.

Equipment needed

This recipe is so quick and easy, you really don’t need much:

  • Chopping board
  • Large frying pan
  • Sharp knife
  • Jug/container for stock

Preparation

Start by prepping all the components. Dice the onion, chop the rashers of bacon into small pieces, and have the stock ready-made and on hand.

Cooking method

The cooking bit is super easy. Fry the onion in oil for about 5 minutes on a gentle heat until golden and then add the chopped bacon. 

Cook the bacon for another 5 minutes or so. Once it looks cooked and shows some caramelisation it’s time to add the rice. 

Stir the rice in thoroughly until it is well coated. Add all the stock and bring to the boil.  Once it has come to the boil, turn it down to simmer.

Continue to simmer until the rice is almost cooked through. This takes about 15-20 minutes.

At this point stir in the peas and continue to cook the risotto until the peas are cooked through. The risotto should have a creamy consistency and not be too dry.

Once the peas are cooked it’s time to serve. Et voila!

How to serve bacon and pea risotto

Bacon and pea risotto served and ready to eat

Like paella, bacon and pea risotto is a very filling dish so we don’t tend to add a side dish. Serving risotto in a bowl rather than on a plate seems to help keep the meal warmer for longer.

We sprinkle grated parmesan cheese (if we have it in) over the plated risotto, which complements it nicely. A squeeze of lemon can be a substitute for some extra zing.

Bacon and Pea Risotto Q&A

Q – How much does it cost to make bacon and pea risotto?

This risotto comes in cheaper than the paella as it has less meat in it. You can expect to make this dish for four people for around ÂŁ6.50.

Q – Can I make risotto with different types of rice?

Risotto or arborio rice is very similar in nature to paella rice. It is round and starchy and its composition means it can absorb five times its weight in liquid. 

For this reason, and much like in paella, it is important to use a good quality stock as the risotto will heavily carry this flavour.

Other types of rice can not absorb the volume of liquid required to make a risotto so they are considered unsuitable. Arborio rice is best with redondo or bomba rice as a second choice.

Q – Is bacon and pea risotto good for me?

We estimate this recipe comes in around 400 calories per serving (more if you add lots of parmesan). It’s a good choice though as it is extremely filling and likely to not need to snack or have dessert.

As this is a one-pot meal, it saves on washing up afterwards.

Q – Is bacon and pea risotto gluten-free?

For the most part, the good news is yes! Arborio rice is naturally gluten-free. The places where gluten may hide though is in the stock you use and the bacon.

Look for a gluten-free stock option. We use these knorr stock pots which are gluten-free. Also, choose bacon which doesn’t contain too many additives. Additives can often contain gluten.

Categories
Camping

How to Winterise a Motorhome: Store Your Campervan Safely for Winter

Many Canadians and Americans in colder states winterise (or winterize) their motorhome, car, boat, or swimming pool routinely every year. In the UK we tend to think about it less, but there are good reasons to give your motorhome some TLC before winter sets in.

Winter is coming. What does that mean for you and your motorhome? Are you still going to be going away or will you be storing it away for the winter season?

Whether or not you want to store your motorhome or campervan away for winter will depend upon how much of a fair weather camper you are and if you only use your van for trips away.

In our case, our campervan is our family car and gets used on a daily basis. Not for trips away sadly, mostly just like a regular car.

Unlike a regular car though, our campervan has features we want to make sure we take care of, to make sure it stays in tip top condition.

Many of us will have sunk a lot of money into our home away from home and want to be sure we are following the right steps to look after it over the harsh winter months.

Winterising your motorhome

If you are planning to hang up your keys for a few months and leave the trips until the warmer weather returns, there are some steps you can take to ensure your campervan or motorhome stays safe and in excellent condition until the spring.

The main winter threats to your motorhome or campervan are:

  • Condensation
  • Water pipe damage
  • Vermin damage
  • Theft

Condensation

Condensation occurs when warm air cools and becomes liquid. This liquid is usually only small droplets but they will find the coldest place they can and form a film or pool there.

Condensation can cause damp if left unchecked and will make upholstery musty.

Ventilation

Some easy steps to take to keep good ventilation in your campervan or motorhome and to avoid condensation:

  • Make sure your fridge is off and propped open.
  • Open all cupboards to allow air flow.
  • Move any fabric items away from the glass windows. Having these propped up in the middle of the van is best. Consider removing fabric items altogether and keeping them nice and dry in the house.

Heat

Some campervan and motorhome owners opt to gently heat their motorhomes instead. If you have access to electricity you can purchase a small oil heater and leave it running on a low heat, just to keep the temperature from becoming too cold on the inside.

These heaters are typically low wattage, so cheap to run and have a thermostatic cut off for safety.

Moisture absorption

This approach removes moisture from the air before it settles as condensation.

An easy method is to use a tray of cat litter. It works a treat at absorbing any damp in the air.

Cat litter can also be used in a sock placed in cupboards for the same effect.

Water pipe damage

A critical issue in winterising your motorhome is to remove any water.

This one is pretty straightforward. If you have left your fresh or grey water tanks containing water then the water is liable to freeze if the weather is cold enough.

Before you put your campervan or motorhome away for the winter double check the water tanks are empty.

If you miss this step and the water does freeze and expand, you could be looking at an expensive repair bill to fix your water pipes or tanks.

  • Empty all clean and waste water tanks.
  • Leave taps open to allow for expansion.

Go for a short drive with drainage points still open to move along all the excess water and make sure the tanks are completely empty.

Vermin damage

Rats can cause expensive damage

It wasn’t winter-related for our van, but vermin are a real problem for campervans and motorhomes.

When the temperature drops, these little pests will be looking for shelter and food.

For us it seemed, “food” was the cable housing on several sensor wires on the underside of our van. Some type of vermin – rat, mouse or squirrel – went to town and caused no end of expensive damage.

This threat is greater in winter as vermin will double down on finding the essentials. Don’t let your campervan or motorhome become a home for rodents! Include pest control in your plans to winterise your motorhome.

You may also have the same nasty surprise we did, that this damage wasn’t covered by our campervan insurance.

Tips to keep vermin at bay

Here are our top tips to prevent pests from making themselves comfortable in your motorhome over the winter:

  • Soak some sponges or cotton wool pads with peppermint oil and leave in various spots around the campervan or motorhome. Make sure to include the engine bay.
  • Buy and set some mouse traps or baits just in case. These ones from the Big Cheese have worked a treat for us.
  • Pestbye Sonic Repellent. This set of two means you can have one in the habitation area and one in the engine bay. They are battery operated so you can set and forget.
  • Protect exposed wiring. We have since used this anti-rodent insulation tape and The Big Cheese Anti-Rodent Lacquer anti-rodent spray to stop future damage.

Don’t underestimate how destructive vermin can be, and how they can squeeze through tiny spaces. The more preventive measures you take, the better. 

It is also worth noting that vermin such as rats and mice, like warm, cosy places. If you heat your van to stop it from freezing then it becomes more inviting for pests so vermin protection is even more critical.

Theft

Sadly campervans and motorhome theft is up year on year. You have to do what you can to keep your vehicle safe.

If it is sitting immobile and untouched for many months on end, it could become more of a target for thieves.

Campervan security is a year-round issue, but worth taking stock when you take steps to winterise your motorhome or campervan.

Here are our tips on how to deter thieves from stealing your motorhome or campervan while it’s sitting idle on your drive:

  • Make sure you have a decent Thatcham alarm fitted.
  • Consider fitting a tracker.
  • Install security lights on the driveway or storage area.
  • Install a security camera like the Ring Spotlight Cam near the campervan or motorhome.
  • Disconnect the batteries.
  • If you have a campervan which has seats that spin round, consider leaving them in the backwards position to make driving away difficult.

There are various security devices you can use on your vehicle to make it immobile or at least will delay a thief and deter them from having a go at stealing it.

Types of immobilising security devices

  • Wheel clamps
  • Steering wheel locks
  • Clamp claws
  • Ghost immobilisers
  • Campervan or motorhome covers

Read More: Campervan Security: The Ultimate Guide

Campervan winter covers

If you don’t plan to use your motorhome or campervan at all over the winter months, consider buying a cover to protect it.

Using a cover on your motorhome or camper will stop damaging frost from getting to the vehicle. An additional benefit is that it acts as an anti-theft measure by making it harder for opportunists to get inside.

If you’ve read other posts on Own The Outdoors, you’ll know we love Kampa as a brand. Kampa manufactures this excellent motorhome cover which is breathable (to avoid condensation), lightweight and easy to use.

Insurance pitfalls

We’ve already mentioned vermin as a key exclusion clause on many campervan insurance policies, but there are some other traps to be aware of.

Some campervan insurance policies will not pay out for damage caused by water freezing in any fixed heating appliance or loss or damage caused by water escaping when the campervan or motorhome is not in use.

This does not apply to all policies, check your small print for details.

Be careful that you don’t invalidate your insurance policy by keeping the campervan or motorhome anywhere other than where you stated when you took out the policy. 

If you plan to store your campervan or motorhome at an alternative storage location for the winter, make sure you inform your insurance company so they can update their records. This may mean an additional cost if the new location is considered higher risk than your usual storage location.

Read More: Campervan and Motorhome Insurance: Best Providers for 2020/21

Campervan winter driving top tips

If you are planning on going out and about in your campervan or motorhome this winter, follow these top tips to help keep you safe on the road:

  1. Make sure you check the engine oil and the levels are correct.
  2. Check the windscreen washer fluid has enough antifreeze content.
  3. Consider getting winter tyres for greater protection on ice and snow. Always check the pressure tyres are set correctly.
  4. Make sure you always carry extra warm layers just in case of a breakdown or road closure.
  5. Always have some water available on board, and a few snacks.
  6. Make sure the motorhome or campervan is warm enough to open the doors and windows. Damage can occur if a door or window is frozen shut. Allow thawing a little before opening.
  7. Same as above with windscreen wipers. Make sure they have thawed enough to use and are not frozen to the windscreen. Never use hot water to thaw your windscreen as it can crack.
  8. Make sure you keep the fuel topped up, just in case.
  9. Turn the engine over every couple of weeks if you can.
  10. If you can move the campervan or motorhome slightly it means it is not always resting on the same circle of tyre and will save on wear and tear.
Categories
Camping

19 Quick and Easy Meal Ideas for Camping

Our selection of quick and easy meal ideas for camping will give you plenty of inspiration to plan your next camping trip – or decide what to cook tonight!

There’s always so much to think about when going away on a campervan trip and you want to make sure you’ve got your bases covered, especially if you’re feeding a crowd.

The last thing you want to be doing once you’ve pitched up is rolling up your sleeves and starting cooking a laborious meal.

Or worse yet, have to go out and look for food when you’re already starving.

Worry not. Own The Outdoors have got you covered with these 19 quick and easy camping meal ideas:

We have two gas rings in our campervan and a further two gas rings on our Cadac gas stove. All these meals can be cooked using a gas cooker and in most cases using just two gas rings.

First night camping dinner

I’ll set the scene: you’ve been driving all day, everyone is tired and you’ve just pitched in the tipping rain or howling gale. Everyone is ravenous.

When going away to explore a new area it is our preference to support the local economy by eating one meal out per day if we can. Typically our first night camping dinner needs to be served on site, unless we haven’t travelled far.

Assuming there is no restaurant or food van on site, we need to rustle up something reasonable PDQ.

Our solution is to bring a couple of pre-made meals just for this purpose. They will have been made in advance at home and then frozen into 2 person portions. This gives flexibility when packing the campervan fridge.

We will have defrosted our first-night camping dinner choice and have this ready to go. We’ll keep another couple of meals frozen and have them defrost slowly over the next couple of days and use when required.

Camping dinner ideas

BBQ steak with tayto tots and salad

1. Spaghetti Bolognese

Who doesn’t like spaghetti bolognese? Always a winner for our family of four. We use two of our 2-person portions of homemade bolognese sauce and cook dried pasta from our campervan pantry.

My Spaghetti Bolognese recipe is packed with “hidden” veg, so we don’t worry too much about a side salad. We’ll just sprinkle a bit of parmesan on the top.

Super quick and super easy!

2. Chicken curry with basmati rice

This not-too-spicy but very tasty chicken curry is also a good option for a first-night camping dinner. Alternatively, it can be camping night dinner #2 if left to defrost slowly over 24 hours.

Although we actually prefer brown rice over white rice at home, brown rice takes ages to cook so we use white rice when camping. As we’re cooking on a limited gas supply, we want to make the meal choices as least-gas-hungry as possible.

Boil-in-the-bag rice is another option instead of cooking brown rice from scratch. We prefer the flavour of white rice over any boil-in-the-bag rice you can buy from the supermarket. It’s all personal choice though.

This curry is delicious served with naan, greek yoghurt, and mango chutney.

3. Steak or burger served with tayto tots

This meal requires a little bit of home prep too, but just a bit.

As previously mentioned when cooking a campervan meal, you want to be mindful about the amount of gas you’re using. It’s a pain in the neck to go and source a new gas bottle midway through your trip.

“Tayto tots” are something we’ve made up at home. Boil enough potatoes for four people (or how many people you are) and when they are soft enough but still firm enough not to be mushy, cut into small pieces. Allow them to cool then bring in the fridge to be fried up on demand.

Not the most healthy choice but these are delicious. Take the ready-cooked potatoes and shallow fry in butter until they are golden brown.

Serve with a juicy rib eye steak or a tasty burger.

Another side we often prepare in advance is fried onions. They can be fried at home, brought along in a bag in the fridge and heated up in the frying pan with the steaks or burgers. Delicious.

Saves on gas ring space, washing up, and time spent.

4. Fish or prawns in foil served with lentils

This recipe is one you make fresh on-site. Wrap the fish in little foil parcels with some lemon and butter and cook for 12-15 minutes over moderate heat.

The lentil dish is great because they come ready to cook from a tin or packet so can be left as a meal choice for later in the week.

We create a lentil dish of green lentils, onions, garlic, chopped tomatoes and some spices.

5. Paella

This Spanish classic is one of our absolute faves and there’s always plenty to go round. It’s an easy one-pot dish so minimal washing up.

It’s a hearty feast of chicken, chorizo, onions, garlic, peppers peas and paella rice.

Check out our paella with chicken and chorizo recipe for full directions.

6. BBQ chicken and chargrilled veg skewers served with flatbread

These are absolutely delicious and very filling if served with flatbread or stuffed inside a pitta. Again, quick to cook and minimal washing up.

Either marinate the chicken in advance or brush with a tangy BBQ sauce.

7. Bacon and pea risotto

This dish is not dissimilar to the paella idea. Another delicious one-pot meal with minimal washing up that’s a real pleaser for the kids.

For full directions, see our bacon and pea risotto recipe.

8. Beef or chicken stir fry with noodles

This is another quick and delicious dinner option, with a cooking smell to work up an appetite.

We get some good quality steak or chicken and stir fry with a bag of ready-to-go stir fry veg. Our personal preference for a stir fry seasoning is the M&S teriyaki sauce. It has a tangy flavour and strong ginger base.

We bring packets of dried noodles to serve with the stir fry and cook on demand. These dried noodles cook really quickly – 10 minutes max.

If we are feeling really hungry, we’ll also cook a pan of rice to have on the side.

Camping lunch meals or lighter camping dinners

Chicken quesadillas cut into wedges

When we’re staying on site for lunch or want something light for dinner we go for quick and easy but satisfying. Here are our go-to favourites.

9. Cheese and ham croissants

These can be done on the gas hob on a low heat so as not to burn the croissant but high enough to melt the cheese. Wrapping them in foil offers extra protection against accidental burning.

The cheese and ham croissants can also be cooked in the RidgeMonkey XL. Make sure you keep turning the RidgeMonkey to avoid the contents from burning.

10. Ham and cheese toasties

As above but using bread rather than a croissant. Less greasy and calorific!

If there is some cheese sauce on the go from another recipe, I spread some on the bread before adding the cheese and ham to make it really gooey.

11. Pizza slices

You can fit two triangles of supermarket pizza into the RidgeMonkey XL to make a tasty light dinner or lunchtime meal option. We will usually serve ours with a side salad ready-made from the supermarket for ease and speed.

As with everything cooked in the RidgeMonkey XL make sure to keep turning the cooking pan over to avoid the contents from burning.

12. Spanish Omelette

This is a hearty lunch option or light dinner choice. Thinly slice the potatoes and the onion, fry these off and bind together with egg.

You can make a 1-2 serve Spanish omelette in the Ridgemonkey, or make a larger one in a frying pan to feed 4-6 people.

We find this more filling than a regular omelette and sometimes have some leftover to have as a snack later.

13. Hot dogs

A camping staple. Quick to make using either frying proper sausages or boiling frankfurter style sausages. 

Delicious served with fried onions, cheese and lots of sauce. We use fried onions pre-cooked at home to speed things up and save gas.

14. Chicken quesadillas

These super-yummy quesadillas are really quick and easy to make.

Cook some chicken in some Mexican-style spice, like an Old El Paso mix and then layer up a sandwich of two flour tortillas. You can add refried beans (camping-handy tinned food), cheese, cooked onions, cooked peppers, and salsa.

Once you have your “sandwich” made, brush the quesadilla with butter and gently shallow fry until lightly golden.

Cut and serve in wedges with soured cream.

15. Macaroni and cheese sauce

This is another dish where I have occasionally made the sauce at home and brought it along in the fridge. 

It will last for a few days in the fridge so can be used over the first few days when required. Perfect for pouring over salmon too.

If the sauce is pre-made then the whole dish just takes as long as the macaroni takes to cook. Nice and speedy.

We’ll sometimes add some ham and peas, if we have them, to add extra flavour and texture.

Camping breakfast food ideas

Traditional full English breakfast fry-up

Our kids are often happy with a quick bowl of cereal in the morning before they go running off to explore the campsite.

When we want them to have something more substantial we turn to these cooked breakfast ideas for making in our campervan or using our camping gas stove.

16. Bacon and egg burger

Another delicious camping staple which always features on our breakfast menu.

Breakfast-in-a-bun also saves on washing up, and our kids love the excitement of eating a burger for breakfast.

17. Pancakes

We often eat pancakes at home for breakfast and trips away are no exception to this. We serve them up with bacon and maple syrup or lemon and sugar.

18. French toast

Similar idea to pancakes but the dipped bread is fried in butter. Also served with bacon and maple syrup.

19. Full English breakfast

Yet another camping staple. We’ll lob in bacon, sausages, baked beans, scrambled eggs, and toast. If we’ve got the gas ring space we might do some hash browns too. No need for lunch after all that!

More camping meal ideas

This is by no means an exhaustive list of what to campervan food to cook but hopefully gives you some ideas and helps you to decide what food items to pack before you leave for a trip.

If you have any favourite camping breakfast, lunch, or dinners, please let us know. We’d love to hear from you.

Happy camping!

Categories
Camping

Easy Paella Recipe – Chicken and Chorizo

Paella is a tasty and filling Spanish favourite that is ideal for a camping meal. Here is our authentic Spanish easy paella recipe with chicken and chorizo. This serves four to six people and takes around 25 minutes from start to finish.

When you’re away from home camping or touring you want to make mealtimes as easy as possible.

Paella is quick and easy to make and absolutely delicious. We find this much more satisfying a meal than say hot dogs and it offers more nutrition too.

What ingredients are in Paella?

  • 400g paella rice
  • 150g marinated red peppers – jar ones are easiest for camping
  • 1l hot chicken stock or vegetable stock – we use 2x Knorr chicken stock pots
  • Pinch of saffron
  • 1 tsp smoked paprika
  • 1 large onion
  • 2 garlic cloves
  • 400g tinned tomatoes
  • 3tbsps olive oil
  • 100g peas
  • 3/4 large chicken breasts (depending on how hungry you are)
  • 200g chorizo
  • 25ml sherry vinegar or wine
  • Chopped flat-leaf parsley
  • Lemon quarters to garnish

This recipe states that it serves four, however, we usually serve six with this without it being stingy on portion size.

How to make paella from scratch

You might be camping but that doesn’t mean you can’t rustle up something just as delicious as you would if you were cooking at home. Here’s how to make homemade paella from the comfort of your campervan kitchen.

Here’s how to make the perfect paella:

Equipment

  • Paella pan or frying pan
  • Chopping board
  • Sharp knife
  • Tin opener
  • Pan for peas
  • Spare large bowl to hold the chicken and chorizo

Preparation

First, prep the ingredients so you have everything to hand:

  • Cut the chicken into 1cm chunks
  • Cut the chorizo into 1cm chunks
  • Dice the onion
  • Slice the garlic
  • Measure out spices
  • Make 1l chicken stock and have it ready to go
  • Pre-cook the frozen peas and have ready to stir in at the end
  • Open the tin of chopped tomatoes
  • Open jar of roasted peppers
  • Cut lemon into wedges
  • Open bottle of white wine or sherry (if using)

Cooking method

Now you have everything ready and to hand it’s time to start cooking.

Heat up 1tbsp of oil in your paella or frying pan. Once the oil is hot cook both the chicken and chorizo until both are cooked through.

Set them aside in a separate bowl to add back to the paella later.

In the now-empty frying pan or paella pan heat another 1 tbsp of oil and wait until it is hot, then place the onions and garlic to cook. Once they have sweated nicely and have turned golden it’s time to add the tinned chopped tomatoes.

Empty the can of tomatoes into the pan and stir. Allow this to cook for a couple of minutes, then stir in the smoked paprika. After a couple more minutes add the paella rice and stir in thoroughly.

Once the rice is evenly coated with the tomato mix, it’s time to add the stock, wine or sherry (if using) and pinch of saffron. Bring the paella to the boil and then leave on a gentle simmer, stirring occasionally. 

This step usually takes around 20 minutes

I find it best to periodically stir the paella as it does start to stick to the pan as the moisture is absorbed. I believe the advice is not to stir, but to shake – like a James Bond martini but we have never found stirring to have a detrimental effect. Our pan maybe isn’t very non-stick?

Once there is little liquid left in the pan and the rice is cooked, it’s time to add back the chicken and chorizo mix.

Cook all together on a low heat for another 5-8 minutes.

The last step is to add the peppers and peas. Stir these in and cook for another 1-2 minutes. 

Turn the heat off and cover with a tea towel for 1-2 minutes then serve.

How to serve paella

We find the paella so filling and satisfying that we don’t add a side dish.

For our chicken and chorizo paella, we simply squeeze over a drizzle of lemon and if we have it, a handful of chopped flat-leaf parsley.

It’s best served into bowls, rather than plates as this seems to keep the heat in the paella better.

Delicious! Our easy paella recipe with chicken and chorizo

Paella – your questions answered

Q – Can I reheat paella?

We do! I had heard that it wasn’t safe to reheat rice, however we have never had a problem in the dozen times we have done this. We make sure the leftover paella has been stored in the fridge and then reheat thoroughly making sure the meat is piping hot all the way through.

The rice ends up more sticky than on day one, but we dont mind. The flavour is still 100% delicious.

Q – Can you eat paella cold?

It’s safe enough to eat Paella cold if it has been stored in the fridge but personally, I would prefer to reheat it. It is supposed to be served as a warm dish so eating it cold seems a bit odd IMO.

Q – Can you cook paella in a frying pan?

Again – we do! As we are in a campervan, you can’t have every bit of kit with you unless it is something you use repeatedly. If you would use a paella pan for a number of dishes such as a risotto or a one pan full English, then it is worth purchasing one. If not, a decent sized frying pan will do.

However if you are thinking about buying a paella pan, this one from Cadac comes highly recommended and is on our wish list. 

Q – Which rice is best for paella?

We typically use “paella” rice to make our paella. This is readily available to buy in the supermarket. Paella rice is made from Redondo (round) or bomba rice. It has a different composition and starch structure to long grain rice, which makes long grain rice unsuitable for making paella.

Redondo or bomba rice can absorb up to three times its weight in liquid which is why we like to use a good quality stock.The rice will take on the flavours in the liquid part of the dish.

Q – Can you make paella with risotto rice?

Risotto or arborio rice is very similar in structure to paella rice. Both types of rice have a high amylose content. This is the starch that acts as a bonding agent in the pan.

By substituting paella rice for arborio or risotto rice it won’t massively change the dish. If you’re camping and making this in your campervan, you’ll think it’s delicious with either type of rice.

Q – Do you cover paella when cooking?

No, you want all the liquid to either be absorbed by the rice or evaporate away. At the very end of the cooking process I cover it and leave it for a couple of minutes to settle. This keeps the rice warm and keeps in that little bit of moistness.

We don’t have a lid for our campervan frying pan so we make meals that don’t need a lid or if we are keeping something warm, we’ll cover the pan with a melamine plate.

Q – Is paella gluten free?

The uncooked rice product is gluten-free. What makes the dish paella NOT gluten-free is the stock used. Often chicken stock contains gluten. The Knorr stock pots we use are gluten-free though. The other gluten source in paella can be in the chorizo. If you need to make this dish gluten-free, seek out gluten-free chorizo too.

Q – Is paella good for me?

Paella rice is low GI meaning it keeps you fuller for longer. This equates to you not snacking afterwards or turning to dessert and ingesting extra calories.

We estimate our paella to contain around 480 calories per serve.

Q – How much does paella cost to make?

We estimate that our easy paella recipe with chicken and chorizo should cost around ÂŁ13.00 all in. Not bad! When served between four it makes it ÂŁ3.25 a portion, or ÂŁ2.15 when split six ways as we do.

Categories
Camping

Kampa Touring Air: Is This The Best VW Campervan Awning?

The Kampa Touring Air is a drive-away awning designed for VW campervans. We review this popular choice and what we like about it, as well as a few niggles.

When we chose a VW campervan as our motorhome of choice, we knew we would we weren’t buying an all-in-one solution.

This may not be the case for everyone but for us, as a family of four, we were aware we would need dry space outside of the campervan if we were all sleeping in it overnight.

We battled with the question of how big an awning to buy. Would a four-berth drive-away awning be too big? Should we get something that just adds a small room to our van? Which is the best drive-away campervan awning? There are so many to choose from.

In the end, we chose to get a full-size four-berth drive-away awning as we felt it would offer us the most value overall. 

There is a good range of drive-away awnings on the market, but after much consideration, we settled on the Kampa Touring Air drive-away awning. Also known by the unwieldy name Kampa Travel Pod Touring Air, it is made specifically for VW campervans and comes in two models – standard and Classic.

Read on to learn why we choose this specific drive-away awning over and above other market leaders and what we think of it now having used it for a couple of years. Was it the right choice?

What is a drive-away awning?

A drive-away awning is essentially a tent, but one with an additional cowl which attaches to your vehicle. 

In our case, we have a VW California Ocean and we connect the cowl or tunnel area of the awning to our wind-out awning rail above the side sliding door.

The most secure and weatherproof way to connect the awning is with a drive-away awning fixing kit. This includes figure 8 plastic strips which slide on to the kador strip – the thick edge along the edge of the tunnel opening, and a separate kador strip which connects between the figure 8 pieces and the awning rail on the vehicle.

If you have unwound the wind out awning a little to help with accessing the rail, it can be wound back in until the tunnel or cowl is taut.

Once attached, you now have a handy walkthrough straight into your vehicle. Keeps the rain off, the wind out and offers privacy

If you want to leave for the day, it is easy to pull the plastic figure of 8 strips out of the awning rail and store inside the awning until you return. The cowl can be toggled away so it doesn’t flap in the wind all day.

There are other methods to create the tunnel walkthrough to your vehicle. These include guying the cowl over the van and pegging to the ground on the other side, using magnetic attachment points on the van body, and a pole and clamp kit.

The benefits of a drive-away awning

Like it or not, when you are away for a trip you are going to be carrying a lot of gear. If you are touring then it is a huge advantage to be able to leave the equipment you don’t need behind for the day. 

This means bedding, clothes and excess shoes can be left at camp rather than touring the countryside with you. 

Having somewhere to stash excess equipment is also handy at night if you are sleeping in your vehicle. 

If you have children you’ll know car seats are bulky and take up precious room and there’s only so much space left in the boot once the bed is down.

It’s also preferable to leave shoes and beach gear out of the campervan if you are sleeping in there at night. 

In our case, we are a family of four and the gear we take stacks up quickly. If we are sleeping overnight in the campervan we have to use an awning to put our extra gear. Either our Comfortz Awning Kit (adds sides on to the wind-out awning), or for longer stays the Kampa Touring Air Driveaway awning.

Kampa Touring Air vs Vango Galli III

Having decided we would like to buy a four-berth awning, we managed to whittle the choice down to two. It was either the Kampa Touring Air or the Vango Galli 3.

Both of these four-berth drive-away awnings are considered “low” for small motorhomes and campervans. The “low” spec offers a connection height to the vehicle of 180-210cm.

The table below compares the specifications and dimensions of both of these drive-away awnings:

Kampa Touring AirVango Galli III Low
Height210cm210cm
Width320cm320cm
Length540cm465cm
Tunnel width90cm120cm
External doors32
Pack weight26.67kg28.95kg
Pack sizeL80 x H41 x H41cmL78 x H39 x W44cm
Number of airbeams44
Fabric150 denier polyester420 denier polyester
RRPÂŁ1,125ÂŁ1,000
Typical priceÂŁ899.99ÂŁ899.99

Both the Kampa Touring Air and the Vango Galli III drive away awnings had their merits. Our previous family tent, pre-campervan ownership, had been a Vango and we loved it.

We were tempted by the Vango Galli III as for us, Vango was already tried and tested as a brand. We knew the build quality and design would be excellent.

Porch vs porch

What swung it for the Kampa Touring Air was the porch space.

We spent a very damp holiday camping in Wales years ago in our Vango six-berth dome tent. We had a little Coleman cooker and a couple of camping chairs and we parked ourselves in the porch area of the tent.

It was a godsend. We had space to cook in safety and we were sheltered from the poor weather. It was windy and wet but we got to enjoy the views in (relative) comfort. It was also spacious enough to leave wet gear and muddy shoes.

The porch space on the Vango Galli III is too shallow to fit our camping kitchen stand which holds our cadac cooking two ring stove. We wanted enough depth in the porch to have the stand sideways on, so it could be tucked against the wall of the awning and the chef stays dry.

It was too short to fit our Outwell table and bench set too, which was a shame. If we were to eat in the porch, then we would be quite exposed to the elements.

Although not deal breakers, the Kampa Touring Air had a few other benefits over the Galli III. 

Groundsheet

We also liked the sewn-in bathtub groundsheet. Nice to have a fitted groundsheet rather than a loose one. Some would disagree with this as some campsites ask for a breathable groundsheet to be used, but we have never had that problem.

Having a sewn-in groundsheet means it stays in place and we find it easy to sweep and keep clean.

With the Kampa Touring Air, the bathtub groundsheet has velcro sewn on along the length of the doors. 

This means when all the doors are closed you can velcro yourself into the main body of the tent and keep the draughts out. It’s really clever and very effective.

Entrance doors

One of these key differences was door access. The Kampa touring air has two entrances into the awning AND the tunnel into the campervan. There is also a door from the tunnel to the outside as well.

You can also velcro the living room floor of the Kampa to the groundsheet in the porch too which makes accessing a breeze and trip hazard-free. The Vango entrances require you to step over them, or trip over if you’re not paying attention.

We have found the ground-level velcro strips collect grass but this comes out easily enough when cleaning up the awning at home after a trip.

Fabric weight

If you have a keen eye you will have noticed in the table above that the Vango Galli III is manufactured from thicker polyester than the Kampa Touring Air. This accounts for the extra nearly 3kg in weight that pack comprises.

We thought hard whether the lesser thickness of fabric would be a compromise for us. On balance we decided we could live with the thinner material. It was worth the lighter pack weight. 

Our Vango six-berth tent had been 32kgs in packed weight and was a behemoth to move. The 26kg weight of the Kampa Touring Air made the decision an easy one.

The Vango Galli III is noticeably shorter than the Kampa Touring Air driveaway awning. Most of this length is accounted for by the increased porch size in the Kampa.

Kampa Touring Air vs Kampa Touring Air Classic

Once we had settled on the Kampa Touring Air as our drive away awning of choice, we then had to decide which version we would like to buy. The Kampa Touring Air or the Kampa Touring Air Classic?

The drive-away awnings are the same all but for the fabric used in their construction. The Kampa Touring Air Classic is made from breathable poly-cotton, the benefit of which is it has better thermal qualities. It keeps you cooler in summer and warmer in winter.

The downsides are the weight and the price. The Kampa Touring Air Classic will set you back ÂŁ1,250 (RRP ÂŁ1,562.50) and it is over 34kgs in weight.

Given the frequency with which we would use the awning, we decided we couldn’t justify the extra cost, over the Kampa Touring Air, neither were we keen on the extra 8kgs in weight.

Thermal quality

We have found that the 150 denier polyester of the Kampa Touring Air does affect the thermal quality of the drive-away awning. It can be cold at night, even in summer and quite hot inside when the weather is comfortably warm outside.

To combat the cold we have a little Kampa Cuboid camping heater we bring with us which we’ll use late in the evening or early in the morning, and it works a treat. 

If the sun is making the awning too hot, the awning design with doors on three sides means we can always get a comfortable cross breeze through the awning to keep us cool.

Layout of the Kampa Touring Air

The space offered inside the Kampa Touring Air Drive Away Awning is exceptional. 

Porch

At the front is the porch is a generous 3m x 130cm in area, which is enough space for a camping kitchen stand, cooker, gas bottle, food crates, dining table and chairs.

The inner body of the tent is in two parts: the main living area in the centre of the awning and the detachable four-berth sleeping compartment at the rear.

Living area

The living area is a generous 3m x 2m and is big enough for the table and chairs should you wish to eat inside, or relax playing cards of an evening.

A vertical set of storage pockets is in the living area between the sleeping chamber doors, and single storage pockets are provided within each sleeping chamber. These are very handy and can be used to hold phones, chargers, maps, etc, and helps to keep the awning tidy.

Inner tent

Included in the price is the inner sleeping tent, which is great value. Other similar brands sell this sleeping compartment as an optional extra.

Blackout fabric is used for the sleeping chamber so the early sunrise doesn’t disturb. The two sleeping chambers can be unzipped to form one larger sleeping chamber, and the central door between the two chambers toggles away tidily.

The length and width of this area is plenty to fit inflatable beds and not feel you are on top of each other.

Tunnel

The tunnel area created by the attachment cowl connecting to the campervan is a useful space. We keep our Porta Potti at the rear end overnight and leave our footwear there when entering the van or awning.

There is a zipped exit door from the tunnel at the front of the awning, providing a “dirty” entrance for muddy booted feet.

Accessories for the Kampa Touring Air Drive Away Awning

There are several bits of extra kit you can buy for the Kampa Air drive away awning. The awning is based on the Kampa Dometic Hayling 4 tent and so Kampa Dometic makes accessories to fit both models.

Lighting

The awning has a velcro strip and velcro tabs sewn on to the inside of the two central air beams to attach lighting. Kampa Dometic makes a lighting system called SabreLink which fits neatly and works very well.

We have a SabreLink Flex set and fix it to one of the air beams. It comes with a remote control to set the dimming level and switch on/off.

It all plugs into either a 12V point or a standard UK power point.

Vestibule

In addition to the driveway awning, we have also purchased the Kampa Dometic Hayling 4 Air Pro Vestibule.

This is a clever zip on attachment to the porch area on the front of the awning. This, in effect, gives us a whole extra room as when it is zipped on, it makes the porch area into a weatherproof space.

This gives our already excellent porch another boost. We take it every time we use the drive-away awning.

It comes with an additional bit of groundsheet too which is nice when you’re padding around the awning in socks.

Carpet

For an added bit of luxury, we also purchased the Kampa Hayling 4 carpet. We use this in the main living space in the awning. Adds a nice cosy feel. We have a shoes-off policy in the awning to stop mud and grass getting everywhere.

Footprint

Lastly, we also opted for the Hayling 4 Footprint. This looks like an extra bit of groundsheet. By putting this down underneath your awning, you protect the underside from the damp of the grass or any stony or rocky ground. We have found it works a treat and after a couple of years use, our awning still looks like new.

We give all the groundsheets a hosing and stiff brushing once we’re back from our trip and they always come up a treat.

Pros and Cons of the Kampa Touring Air

Pros

Here are the features we love best about the Kampa Touring Air:

  • Porch space – plenty for food preparation and seating under cover.
  • Door access – three non-trip entrances.
  • Velcro system – cosy at night, eliminates trip hazards when doors open.
  • Plenty of mesh doors to keep the critters out but the breeze in.
  • Natural light – lots of widows but they all have blinds if you want privacy.
  • Generous space for living and sleeping.
  • The two built-in inner tents.
  • Velcro attachment points for lights.
  • “Bathtub” high-sided sewn-in groundsheet
  • High visibility guy ropes. These are foolproof to use, easy to adjust. Trip hazards are (almost) a thing of the past.

Cons

There are a few minor annoyances worth noting.

  • The porch groundsheet has two elasticated corners which are supposed to attach to toggles, but we have yet to manage this on both corners.
  • Attaching the vestibule groundsheet creates a trip hazard with the porch groundsheet. We had to tape them together to overcome this, which isn’t ideal.
  • It gets quite hot in warm weather and very uncomfortably hot in hot weather. This would be better with the Classic model with heavier material.
  • Grass gets stuck in the velcro strips on the external entrances, requiring some effort and ingenuity to remove.
  • Rain can collect on the tunnel roof, depending on tightness and angles. May require a push from underneath to clear during heavy rain.

Are we happy with the Kampa Touring Air drive-away awning?

Did we make the right choice buying the Kampa Touring Air Drive Away Awning?

You bet we did. We have been thrilled with it and love it as much as our actual home. Our van and this awning really is a home away from home.

This awning is a fantastic purchase and worth every penny.

Frequently Asked Questions

What does the Kampa Touring Air cost?

The RRP of the Kampa Travel Pod Dometic Touring Air is ÂŁ1,125. Outdoors retailers often seem to discount the price to around ÂŁ899. We managed to find one listed on sale at ÂŁ799. It pays to shop around.

What does it include?

The Kampa Touring Air Drive-Away Awning comes with:

  • Awning with four AirFrame inflatable poles.
  • 4-berth inner tent.
  • AirFrame 2-litre hand pump.
  • Peg set, with additional storm straps.
  • Manual with set up instructions.
  • Zipped carry Bag.

Is it durable?

Yes. The Weathershield™ 150D polyester material is weather resistant and will keep you dry in the heaviest rainstorm. It is rated UPF 50+ for sunnier weather conditions.

Designed for touring and short-term stays. The manufacturer states that it is not suitable for long-term (ie, seasonal) pitching.

What are the dimensions?

The dimensions of the Kampa Touring Air are as follows:

  • Length: 540 cm
  • Height: 210 cm
  • Width: 320 cm
  • Connection height: min 180 cm, max 210 cm
  • Connection width: 280 cm
  • Weight when packed: 26.64 kg

How long does it take to pitch?

As it is inflatable the Kampa Touring Air is easy and quick to pitch. It typically takes 10-20 minutes to set up with two people involved but can be pitched by one person.

Is it stable in poor weather?

The Kampa Travel Pod Touring Air copes well in windy conditions, and has storm straps included for extra stability. It is important to use all the available pegging points and guy ropes, especially if windier weather is expected.

Is the porch waterproof?

The roof and walls of the porch are waterproof, however, in windy weather rain can blow straight into the porch area. The additional vestibule adds a transparent front wall with zipped doors, making the area weatherproof.

Gear Review: Kampa Touring Air VW Awning

Quality
Ease of use
Ease of assembly
Features
Value for money

Summary

The Kampa Touring Air Drive-Away Awning for VW Campervans is well designed and spacious. It will suit a family of 3-5 that need the extra space for living, gear storage, and overflow sleeping.

4.6
Categories
Camping

Campervan Food Essentials: What Food to Take and How to Store It

In this article, we open up our campervan pantry cupboard to discuss our campervan trip food essentials. It is said that an army marches on its stomach – our family certainly does, so food is key to a great trip.

Say the words “campervan trip” and I think flexibility and freedom. There is something magical about a trip away in the campervan that can’t be topped. 

Best of all it’s fun and convenient to be able to park up somewhere and put together a snack or a meal. You might well be wondering what food you should keep your campervan stocked with to aid a quick and easy meal on the fly.

Read on to learn what food we bring and how we keep it safely stored.

Campervan food packing list

Our family enjoys eating, that’s a fact. The kids complain when they’re hungry, that’s another fact.

The food we take in our campervan is a big deal for us. Just winging it isn’t an option.

We also like to have plenty to eat on board so we aren’t forced to have to visit shops all the time. It’s nice if you’re camped up somewhere and hungry that you can just set to and whip something up.

So, we’ve developed a food packing list for our campervan adventures. To make life easy when we’re on a trip we always stock the following items in the campervan.

Pantry items

Our pantry items can be assembled and packed in the days ahead of the trip. As you’ll see below this also involved some measuring and repackaging, so early preparation is important.

Basic ingredients

  • Stock cubes, mixture of chicken, beef and vegetable.
  • Cooking oil – small quantity in well-sealed bottle.
  • Flour – small amount (some pre-measured for pancakes).
  • Sugar – granulated, and sometimes sugar sticks for hot drinks.

Tins, packets, and jars

  • Tins of soup.
  • Super noodles.
  • Crackerbread.
  • Batchelors Pasta n Sauce mix.
  • Dry pasta.
  • Jar of pasta sauce.
  • Jar of pesto.
  • Breakfast cereals.
  • Jam and/or marmalade.
  • Vegemite – we are Aussie after all (no Marmite, thanks).

Hot drinks

  • Teabags.
  • Herbal tea bags.
  • Coffee – granulated, decanted into small sealed container.
  • Hot Chocolate – small jar or sachets.
  • Mini marshmallows.

Treats and snacks

  • Crisps – we love crips and always have a massive range.
  • Biscuits – ditto above comment for biscuits.
  • Tuc/Cheddars/Ritz – or in our case all of them. We also love crackers.
  • Chocolate and sweets – yes very naughty.
  • Cereal bars.
  • Fruit string/Bear Yoyos.
  • Red wine (handy as doesn’t take up space in the fridge).

Condiments

  • Ketchup.
  • Soy sauce.
  • Maple syrup.
  • Salt and pepper.

Perishable food 

In addition to the pantry food, some perishable food is necessary too. We always bring the following when starting our journey.

  • Bread.
  • Eggs.
  • pikelets/crumpets/pancakes.
  • Potatoes.
  • Carrots.
  • Tomatoes.
  • Apples.
  • Bananas.

We don’t store a lot of fruit and vegetables in the campervan or our awning as we find it doesn’t keep for more than a couple of days at best. Our fridge runs extremely cold so anything with a high water content like fruit or vegetables are easily spoiled.

We tend to buy fruit and eat on the day, or use it as part of a pudding. We’ll pick up vegetables or a pre-made salad pack and use that on the day.

The interior of the van does stay nice and cool so any food keeps well for a few hours from shop to plate, even if not kept inside the fridge.

Fridge items

Luckily for us, we have a large 42L capacity chest fridge built into our campervan. Because it’s a chest fridge it means it can be fully loaded to the top. A more conventional front-loading fridge is more restrictive to pack and items easily move about in transit and fall out when you open the door.

The following items are our campervan fridge essentials:

  • Single pints of milk – they are smaller so more versatile. We usually take at least four.
  • Cheese – regular mousetrap, plus one or two more interesting varieties.
  • Butter – always the spreadable variety even though we have blocks of butter at home. This is because the fridge is very efficient and regular butter turns to stone.
  • Yoghurts – individual serves rather than bigger tubs.
  • Ham, chorizo, other cold meats.
  • Bacon – nothing like a cooked breakfast when camping.
  • Two cooked meals for 4 people (to see us through the first couple of days to take the pressure off).
  • Chilled wine and beer – depending on the fridge space left.

We also use a fridge deodoriser, to help soak up smells. We’ve tried out a few, but charcoal bags have been the most effective. We currently use these Jorlyen Air Purifying Bags and keep one in the empty fridge all of the time.

Campervan food storage

To get the longest life out of your food it is best it is stored correctly. How to store your food in a campervan is a personal choice but this is how we do it.

We use Tupperware and lots of it! Tupperware or other plastic food storage containers is fab. It’s stackable, versatile, reusable and unbreakable.

As we like to carry plenty of food on board our campervan, we need to be clever with how we store it.

Pre-bagged portions

Before we leave for a trip we will usually calculate how much of any one item we are likely to need and measure out the required amount in advance.

For example sugar. Rather than taking a whole bag, we’ll measure X amount of teaspoons of sugar into a container or sealable plastic bag. Ditto with the flour, coffee, hot chocolate, and tea bags.

We all like different types of cereal in the morning. To allow for that variety without the volume we will measure the amount we need to save on taking four different cereal boxes.

Yes, I will admit it seems hardcore but I measure out portions according to the packet guidance and individually store each one. That means if someone wants Shreddies, they grab a pre-measured portion and they’re good to go. 

These fab reusable sandwich bags are just the ticket for the job and save on plastic waste.

Pre-measuring portions is quite labour intensive pre-trip, I’ll admit, but it does save on space and simplifies things at the campsite. When there are four of you to feed, these little space-saving tips do make a difference.

Cupboard organisation

In our VW California Ocean we have the luxury of kitchen cupboards and an under-bench seat.

We keep the pots, pans and crockery on the left-hand side of the kitchen, top and bottom shelves. If the rear bench seat is pushed far forwards (to allow for maximum boot space) this cupboard is often inaccessible in transit.

The right-hand side is where we keep most of our food. The cupboards are nice and deep and the shelf dividing the cupboard unit is high enough that you can stack two tins on top of each other.

As we don’t usually need tins when in transit, they are stacked at the bottom of the cupboard and at the back. Anything I may want to access in transit is at the front of each shelf.

We use anti-slip matting to make everything stay where it should be during transit.

Snacks drawer

The under-bench seat drawer is used to house our goodies. I tend to travel in the back when we’re on a trip and I can open the drawer and whip out the snacks.

There is enough room to fully open the drawer even if the bench seat is pushed all the way forward.

This storage space is actually huge and can be used for more than in-transit snacks and goodies. It is also good for kit you might want to get your hands on asap once you’ve arrived on site.

How to store food in a drive-away awning or tent

We’ve learned these lessons the hard way! 

We tend to empty the campervan of a lot of food if we are bringing the driveaway awning. 

This is because if we are on a longer stay we use our Cadac stove for cooking in the porch area of the awning instead of using the campervan stove.

This is a personal choice but because we have two small children in and out of the campervan it feels safer to keep the cooking outside.

As we are likely to be sleeping in the campervan it keeps the cooking smells at bay too.

It makes sense for us to keep the food we’ll be cooking, near the stove so we keep it in the porch area with the cooking equipment.

Crates are great

If you have food in your tent or awning it is best kept in a sealed crate like this one. These are the perfect size and stackable if you have more than one.

Rather than bring a crate specifically for food, we tend to use the crates for something else in transit and empty it and use the contents when we are camped.

It leaves the crate available for other uses such as food storage. Having a lid means the food is kept fresh and no critters are able to get in and have a munch. It’s also handy for keeping the awning nice and tidy.

If you are keeping food in the porch area of your tent or awning, you’ll find the air in the area becomes very damp overnight with dew. Keeping your food items in a sealed crate will mean your food stays dry and crisp.

Categories
Camping

Campervan Hire in the UK: The Ultimate Guide

There is nothing better than enjoying the outdoors in a campervan. Hiring one is a great way to get out and appreciate landscapes, activities, and people in the UK and further afield.

I remember the first time we hired a campervan. It was in Perth, Western Australia.

The van was a long wheel-base Mercedes Sprinter van conversion. Containing an internal toilet and shower, it was more of a motorhome than a traditional camper.

There was an abundance of similarly-equipped vans for rent there, and they were designed to suit the terrain in that part of the world. The more adventurous could choose the off-road 4 wheel drive versions, but we were comfy campers, happy to stick to the sealed roads.

From that first trip, we were hooked. We loved the freedom of the open road – turning up at some random site for the night in the middle of nowhere, just adventuring.

Over time we have become campervan owners ourselves. We can’t stress enough though the importance of hiring a campervan first before rushing off to purchase one. We have hired many vehicles over the years to really double down on what vehicle suits our family needs best.

It’s easy to become seduced by pictures online of beautiful landscapes and the ability to tour where you like, but first, try before you buy. You might just surprise yourself with what you discover are must-haves and no-ways.

Campervan hire – needs and options

The first step in hiring a campervan is identifying what your requirements are.

Answer these questions to help you decide what vehicle to hire. 

  • Budget and timescale: Flexibility on either or both will give you more choices.
  • Seatbelted seats: How many people need to travel in the vehicle with you? Most vehicles will offer 5 seatbelted positions but there are vehicles like the VW California Ocean that only have 4 seatbelted positions.
  • Berths: How many people will be sleeping in the vehicle? Campervans typically berth two to four people but larger motorhomes can accommodate anything from four to eight.
  • Kitchen: Do you need to have cooking facilities and a fridge on board? Most campervans offer this built-in but specialist vehicles such as the VW California Beach or a Landrover with an ikamper do not.
  • Bathroom: Do you need a shower and toilet available or will you be camping at a site with an amenities block?
  • Parking: Will you need to park at supermarkets or town centres? Bear in mind the limitations of parking a longer and wider vehicle.
  • Equipment: Many hire vehicles with a kitchen come with basic food prep and dining equipment, but you may have to hire or take bedding, an awning, and any other camping equipment.
  • Off-road: Do you plan to do any wild camping or drive on remote beaches? A 4WD camper may be what you need.
  • The UK or Europe: Taking a vehicle across the Channel or the Irish Sea may incur extra hire and insurance costs.

What’s the difference between a campervan and a motorhome?

There is a certain amount of overlap between campervans and motorhomes, but it is useful as a hirer to understand the basic differences.

In brief, a campervan is typically a 4/5-seater, 2/4-berth vehicle which has been built from a commercial van body. Campervans can have a short- or long-wheelbase and can come in different heights too. A short-wheelbase van is about the same length as a standard estate car.

Campervans often have a pop-up roof bed, and there is no divide between the cab and the living quarters.

A motorhome is usually a wider and longer vehicle than a campervan, and is built on a bus or truck chassis.

Motorhomes are designed to be completely self-contained with all facilities on board including a kitchen, shower, and toilet. There is usually a clear separation between the driving cab and living quarters.

How to hire a campervan or motorhome

There are a couple of ways you can hire a campervan. You can either hire from a campervan or motorhome hire company with their own fleet, or from a private owner.

The best way to hire privately is by using a peer-to-peer private campervan hire website.

We have done both and so can offer insights on the pros and cons of each.

Campervan hire companies

This would be the usual starting point for someone looking to hire a campervan or motorhome. A quick Google search will help find companies local to where you live or where you want to hire from.

Pros

  • High-quality modern vehicle.
  • Well maintained.
  • Help on hand if required on the road.
  • Replacement vehicle supplied should it be necessary.
  • Choice of campervans available.

Cons

Peer-to-peer private hire websites

These are a new breed of websites which allow a campervan or motorhome owner to list their vehicle for hire. The platforms act in much the same way as Airbnb does for holiday properties.

Pros

  • Often cheaper daily hire fee than a traditional hire company.
  • More camping equipment supplied with the hire.
  • Often more accessories available to hire additionally.
  • Often more flexible with minimum hire periods.
  • Wide range of unique campervans to appeal to all tastes.

Cons

  • No back-up vehicle should yours break down or you encounter problems.
  • You may be reliant on your own breakdown company should you need help.
  • A big responsibility in using someone’s personal property.

Campervan Hire Costs in the UK

Typical costs you can expect to pay when hiring a campervan are:

  • Per night fee – there is often a two or three-night minimum.
  • Additional driver fee.
  • Damage deposit – refundable when the van is returned in good condition.
  • European travel surcharge.
  • Motorhome hire excess insurance (optional).
  • Additional equipment hire.
  • Pet surcharge. 

Sample costs for hiring a VW campervan

Here are some sample costs as a guide as to what it will cost to hire a similar VW campervan from a hire company and privately.

The prices shown are a guide only, and will vary according to the campervan model, additional requirements, and time of year.

CostCampervan Hire CompanyPrivate Campervan Rental
Per-night hireÂŁ120ÂŁ100
Non-refundable booking deposit50% of total booking50% of total booking
European surchargeÂŁ184European travel often included
Additional Driver (one off fee)ÂŁ66Usually included
Pet surcharge (one off fee)£50Included at owner’s discretion
ExcessÂŁ1,000ÂŁ1,000

What do you need to hire a campervan?

Typical requirements for hiring a campervan are:

  • A UK driving license, held for a minimum of 2 years. You’ll likely be asked to share your license information from the DVLA.
  • Another form of ID which proves your address.
  • Aged from 25-70 years of age.
  • A credit/debit card to pay the booking deposit to reserve the vehicle (often 30-50% of total booking cost).
  • A credit/debit card to secure the refundable damage deposit – an imprint of typically ÂŁ750-ÂŁ1,000.

Hiring a campervan through a campervan hire company

Luckily for us, there are a few reputable campervan hire companies locally to where we live. We made an appointment with a well-known one, to have a look at their fleet.

Having hired vans before, we knew what sort of vehicle we were looking for. Their campervans were only a couple of years old at most. All were beautifully clean and maintained. We made our selection and got our booking confirmed.

Hire period considerations

When hiring a campervan, one practical consideration is deciding exactly how long you are going to need it for. This isn’t just how long your trip away is going to be. You also need to factor in getting your van packed and unpacked again. 

Packing and unpacking

With our first UK campervan hire, we filled our family car to the brim and drove the 20 minutes to the hire location. From there it took a good hour to get everything in, kids and all and get away.

The hire company we used offered secured parking for our family car so we could leave it at their premises for the duration of our holiday which meant we could pack and unpack the van on site.

It did mean we were limited to what we could bring with us to what we could ram into our family car. It would have been preferable to have driven the campervan back to our home and packed it there. 

That would have meant the hire period would need to be longer though at both ends of the trip to achieve this. The cost overall would be an extra day as we would have wanted to pack the van and get away early in the morning. 

Cleaning

Also, make sure you understand whether you are to clean the campervan on return as well, as this will take extra time.

Office hours

Most hires commence and end during office hours which limits how many miles can you get in on your first and last day of travel. This isn’t important to everyone but to us, with two small children, it did.

Hiring from a private campervan website

We found a private van owner close to our home on a private hire rental company website.

They had a VW conversion, very similar in spec to what we had been thinking about buying for ourselves. A perfect try-before-you-buy scenario. Better still it was available for a 10-day hire over the school holidays. 

The hirer was very flexible about allowing us to view the van in advance, he offered to deliver it to our house for us and offered us extra equipment we could hire in addition to the inventory that came with the van.

We weren’t charged for the extra time we had the van to allow us to comprehensively pack and be ready for our grand tour.

As there wasn’t a rental booked directly after ours, he was also generous on the return time which was helpful as we needed time to unpack and clean the van before returning it.

The key benefits we experienced were; a more reasonable cost per night for the hire than through the campervan hire company, an opportunity to hire equipment we didn’t own ourselves, to improve the experience and greater flexibility with timings.

It definitely helped us with the decision on what campervan we should ultimately buy.

Read more: Private Campervan Hire (How to Hire Someone Else’s Campervan)

Campervan and Motorhome Insurance

You might be wondering how the insurance works when hiring a campervan or motorhome.

Hire companies cover the first-named driver with a fully comprehensive insurance policy for the duration of the hire. This is included in the per-night hire cost.

If you add an additional driver to the hire agreement, then this is extended to them too but costs and additional fee.

The security deposit you pay on hiring a campervan or motorhome is usually anything from ÂŁ500-ÂŁ1000. The hire company will take an imprint of your credit card to ensure against loss or damage.

Extent of cover

You need to be aware though that the insurance often only covers damage to the hire vehicle and third parties, but not your property or passengers. Make sure you read the small print when you receive the rental agreement.

Just in case, it is worth having your own travel insurance to ensure medical and personal belonging costs are covered.

You are liable for any damage which occurs to the campervan whilst you are hiring it. This is true if someone backs into you in a car park or opens their car door into the side of the vehicle and leaves a dent. Not your fault but the liability falls with you as the hirer of the vehicle.

One way to protect yourself is to take out motorhome hire excess insurance which reduces your liability down to as little as ÂŁ150 should the worst happen.

Always double-check the clauses and make sure you are aware of what is covered and what exclusions apply.

Private campervan hire insurance

If you hire a campervan or motorhome through a private hire website, you can rest assured insurance is part of the arrangement.

Depending on which platform and even which campervan or motorhome you hire will depend on the individual insurance conditions. There is always insurance available or included so you can hire away, worry-free.

Read more: Excess Insurance for Campervan Hire (a Guide for Hirers)

Are you licensed to drive a campervan?

An ordinary UK drivers license permits the holder to drive a vehicle up to 3,500kg Maximum Authorised Mass with up to 8 passenger seats and driver. You can tow a trailer of up to 750kg in addition to this.

Many campervans and motorhomes are “plated down” to 3,500kg to allow for the vehicle to be driven with an ordinary car driving licence. 

Should you hire a SWB or LWB campervan?

The first time we hired a campervan in the UK we hired a converted VW transporter from a local hire company. We opted for a long-wheelbase vehicle as that mirrored what we had hired previously and felt that, as a family of four, we would need the extra space.

It was a bonus to have the extra internal space (around 30cm more than a SWB van) but we had to weigh up whether the extra space on the inside was worth the limitations of being in a long-wheelbase vehicle.

The first thing we found was parking in any car park was a potential problem. Most spaces allow for 5m vehicle length only. 

A VW Transporter SWB base van is 4,892cm and a VW Transporter LWB 5,292cm

Standard parking bays in the UK are 2.8m wide by 4.8m long.

This is true whether you find yourself in a supermarket car park, a multi-storey car park, or a town-centre council car park.

The only place we found we might get lucky was parked on the street but the chances of finding a parking space big enough to fit a long wheel base in high season in a tourist town are slim.

Whether you hire a motorhome, long-wheelbase or short-wheelbase campervan comes down to your own needs; how many passengers, berths, facilities on board and parking limitations.

I’m pleased we hired that long-wheelbase vehicle as our first campervan hire in the UK. 

The UK isn’t the same as Australia in terms of roads, parking spaces, or campsites and so it highlighted to us the limitations of driving and parking a larger vehicle and how that was something that in the end was not negotiable. Short-wheelbase all the way for us.

What additional equipment do you need for your campervan hire?

Each campervan hire company will provide you with an inventory list of equipment they provide. This will vary from company to company. 

They will usually provide electric hook up cables, a full gas bottle and full, clean water tank.

Typically you will need to provide:

  • Bedding.
  • Kitchen equipment, plates, pots and pans, cutlery.
  • Basic food items.
  • Clothing.
  • Towels.

Some hirers do offer some of these items for an extra fee.

Read more: What to Pack for a Campervan Trip (Complete Packing List)

Do you need to take an awning/tent?

For us as a family of four, it’s a yes every time. Kids come with plenty of clobber, including car seats which need to be stashed somewhere when you’re sleeping in the van.

If you are using the van as a touring vehicle during the day, it is handy to offload the equipment you don’t need during the day, so you have more space to eat lunch, get changed for the beach or play games.

It doesn’t need to be a “proper” awning that connects to the van; any extra tent space is handy. It can also double as an emergency location for your portable toilet so you don’t need to stumble to the amenities block in the night or if you have little kids who just can’t wait.

Having extra sleeping options is no bad thing as you never know what the great British weather will throw at you.

On a recent trip to Cornwall, we were faced with gale force winds over two days which meant we were worried about having the roof up. Following a rainy midnight effort to get the pop-top roof down safely, two of us needed somewhere else to sleep. Thank goodness for our extra tent space!

Exit mobile version